3D Resin Printing 00 Model Trains #1
Introduction and 00 gauge model train wheel setup
Where to Start
The best way to get started with 3D printing is to jump right in, trial and error. Wrong.
The best way to get started with 3D printing is to read lots of guides and watch lots of tutorials. Learn how to clean and fix the machine before your first print. Pick a selection of simple and complex models someone else has printed before. That way you know they work. Measure everything twice. Understand supports and play with bundled software.
Or you can do what I did; buy all the equipment, leave it in a box for a year, keep watching videos but never do anything. Then randomly take a 4 day weekend and realise you should have done this a year ago. It’s a long, boring story
Spoiler; my first custom print was a total failure. So what do I know.
Disclaimer...
Nothing here is meant to be realistic. I’m not hiding from the world in a locked room surrounded by tens of thousands of currency units worth of model trains.
I’m a coder. 3D modelling is fun but needs constant practice like any skill. For 20 years I’ve been drawing stuff because I could. Now I can make something and print it. This is for fun.
My Equipment
The expensive stuff:
Elegoo Mars 2 (2k resin printer)
Bundled with:
Mask
Gloves
Scraper
Paper funnels
Tool Kit
Backup Screws
Elegoo Wash & Cure Machine
Draper Storm Force Rotary Multi-Tool Kit
I already had one, doubt everyone will
It’s useful for quick sanding and drilling out smaller holes which may have been used for supports
The smaller stuff:
12x liters of Isopropyl alcohol
It was cheaper to buy in bulk
3x 1 liter of Elegoo photopolymer resin
Was on sale; white, black and green
1x 1 liter of Amazon own brand photopolymer resin
Was on sale and cheaper than Elegoo
Some big plastic funnels for filtering resin and alcohol
Metal filters to sift out loose print trash from resin and alcohol
Made more sense than constantly buying paper filters
Metal files for sanding
Not looking for production level at the moment, just the basics
Digital caliper to measure template components
Software:
Chitubox (primary)
PrusaSlicer (secondary)
Autodesk Meshmixer (last resort)
Maya 2022 (or 8.5 if I want to work faster, I hate 2022)
Technology moves fast and it took me a long time to buy a 3D printer. I wanted a resin one for detailing miniatures. It took me a year to start using the printer and in that time I could have bought an 8k printer for the same price. For a little more, I could have gotten a 12k printer. That’s life.
I’m not going to buy anymore equipment. If a 2k resolution isn’t enough detailing for OO and N scale trains, I’ll move on to something else. It should be.
Picking Wheels to Copy
I picked up some used OO and N gauge train parts off eBay. Around £30 got me lots of track and a few carriages. Everything is a little rusty, dirty and incomplete in places. It’s good enough to take measurements with a digital caliper. True, I could download schematics off the Internet. But I would still need real track carriages to compare against.
As it happens, the... carriages? Rolling stock? I don’t know train terminology. Some train things came with different sets of wheels. None were exactly the same size. The difference is a few millimeters and I only noticed it because I was measuring down to a 0.01 mm thickness.
Each set of wheels fitted perfectly in to every unique carriage I had. There was no rubbing and each rolled freely. I was expecting stricter tolerances. It’s a good thing as my prints won’t be ruined if the cheapest digital calipers from eBay are off by 0.1 mm. Or more!
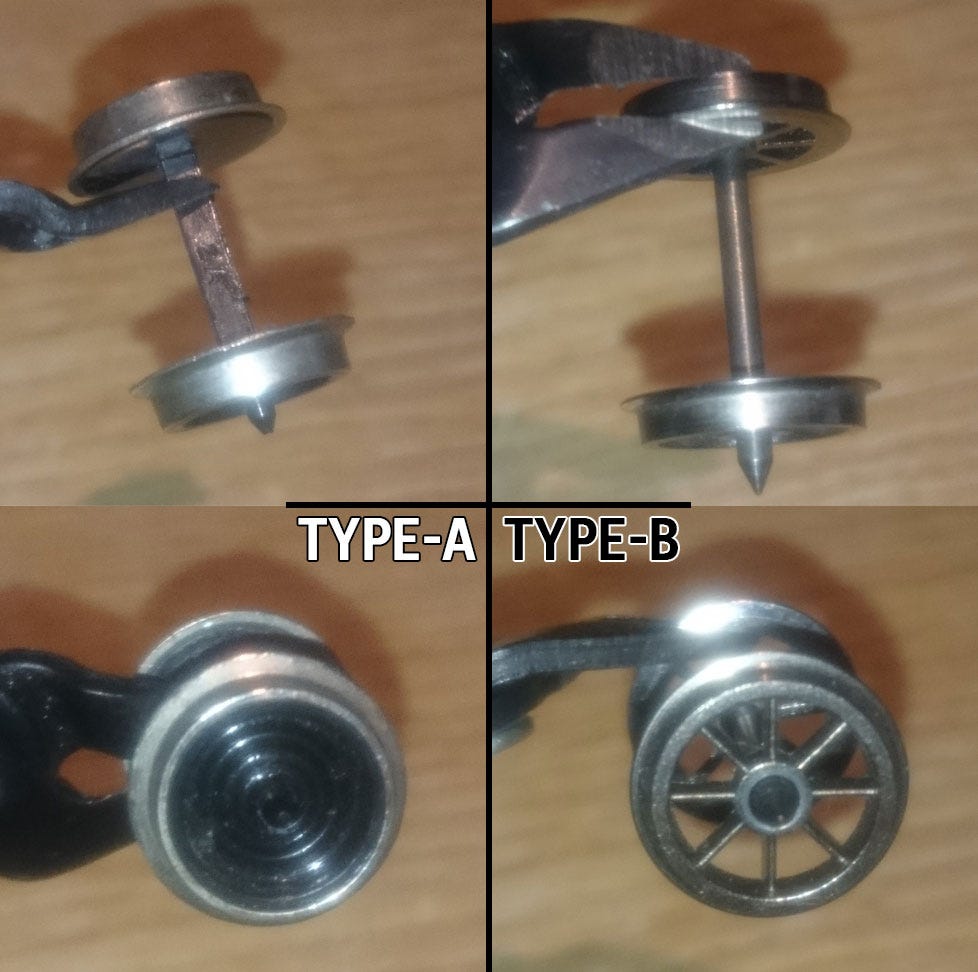
I picked 2 sets of wheels as templates for my first printable 3D model:
Having never created an exact model with millimeter tolerances before, it would make sense to go with Type-A. I went with Type-B. The reason being that it would give me an idea as to what level of detail my, somewhat, outdated 2k printer could achieve. After all it’s a basic spiked wheel. Won’t take hours to draw, so not much time wasted.
There seems to be little standardisation in model railways. There is obviously some in regards to gauge; wheels need to fit between the tracks. All the wheel sets I tried had monstrous gaps between the inner flanges and inner rail. This causes trains to slide side to side quite a lot. I guess that’s normal?
The flanges function is to keep a train on the track. Without them the wheels would slip off the trails. This tolerance is obviously a lot less on miniature models than their full sized counterparts. But precision is required for when model trains pass through points, because there are guides which the flanges pass between.
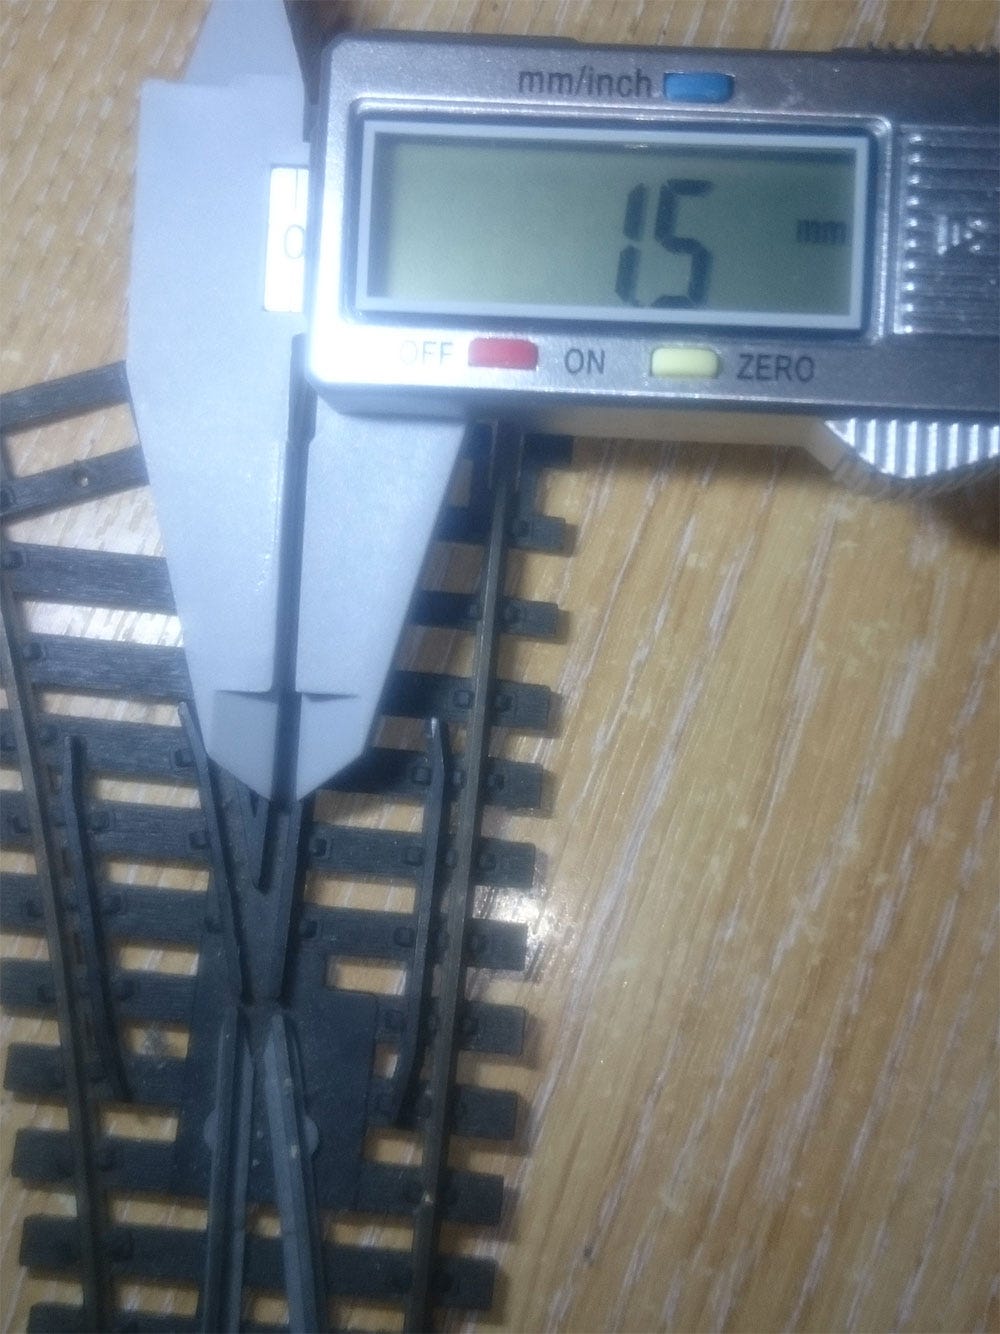
As usual, flange distance varied. My ancient track pieces have gaps of around 1.5mm. I’m hoping to print on a 0.03mm scale, leaving plenty of space for error. I obviously don’t want the flanges rubbing any part of the track. So long as I measure within a tolerance of 0.2mm there should be plenty of room for error.
He says, anticipating massive derailments later on…
Measure Twice, Cut Once, Swear Lots
I bought the cheapest digital caliper I could find on eBay. Less than £5. Measurements don’t need to be perfectly accurate, so long as it’s close. I can tweak the design after the first successful print.
However, I do need some initial guidance and it’s impossible to find anything on the laughably censored Internet these days. With Maya measurements set to millimeters, the same as my caliper, I got to measuring.
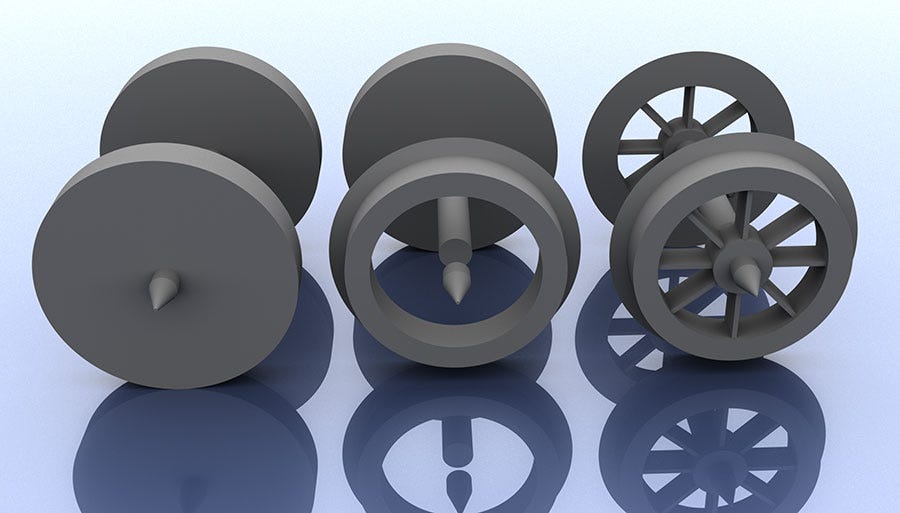
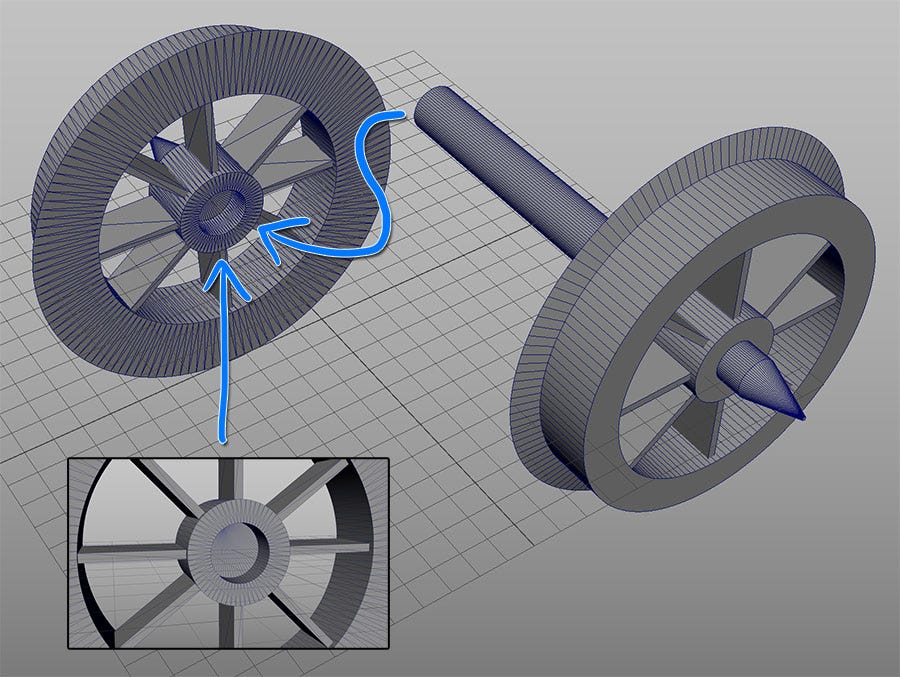
The above is is the model for my first run. 4,276 polys if interested. Took about an hour to make because I wasn’t confident some of the tolerances would print well. It’s a simple wheel with 8 spokes. Point to point, total width on my metal wheel sets were between 25 mm and 26 mm. I went with 26 mm as it would be easy to file down later if too long for a carriage.
Axle width is 2 mm. The outer part of the axle, pointy bit which attaches to the chassis, is 1.6 mm wide. I measured a few times and these were the numbers on the template wheels I bought. Perhaps the inner axle which connects the wheels is thicker to prevent flexing?
A slight flexing will be present on my resin prints when trying to fit them to a chassis because they’re of a weaker material. Unless I make the axles far thicker than 2 mm. Shouldn’t be a problem. If anything it might make the wheels easier to install than metal ones. Possibly the only benefit over metal?
The taper on my outer axle point took some common sense to design. It could come to a point, but I made it slightly blunt. A sharp point would gradually wear away over time; these tips are the only contact the wheels have with the chassis. By making it the same length but blunt, the life of the axle is slightly extended at the cost of a little friction.
Switching from metal to 3D printed resin will greatly reduce weight. Which is good for climbing hills but bad for overall stability. Trains won’t sound the same plodding around with plastic wheels. I couldn’t care less.
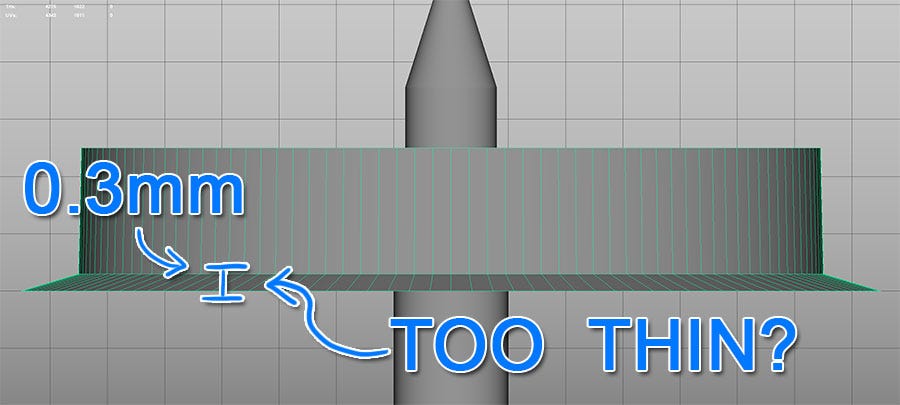
To keep wheels on a track, a flange is present on the inside of the wheel. This will be trial and error. I intent to print at a layer height of 0.03 mm. In this first pass the flange is 0.3 mm, or 10 layers, wide and I’ve tapered the edge to a point. I think that may be too thin and cause the flange to warp?
How thick should I make the flange? Should I accept that it’s going to have some level of minor warping? I’m not going for ultra-realism, but also don’t want it to look amateurish. The flanges are on the inner edge of the wheel, under the chassis, so I suppose it doesn’t matter if they’re unnaturally wide? No one will see them when the train is running.
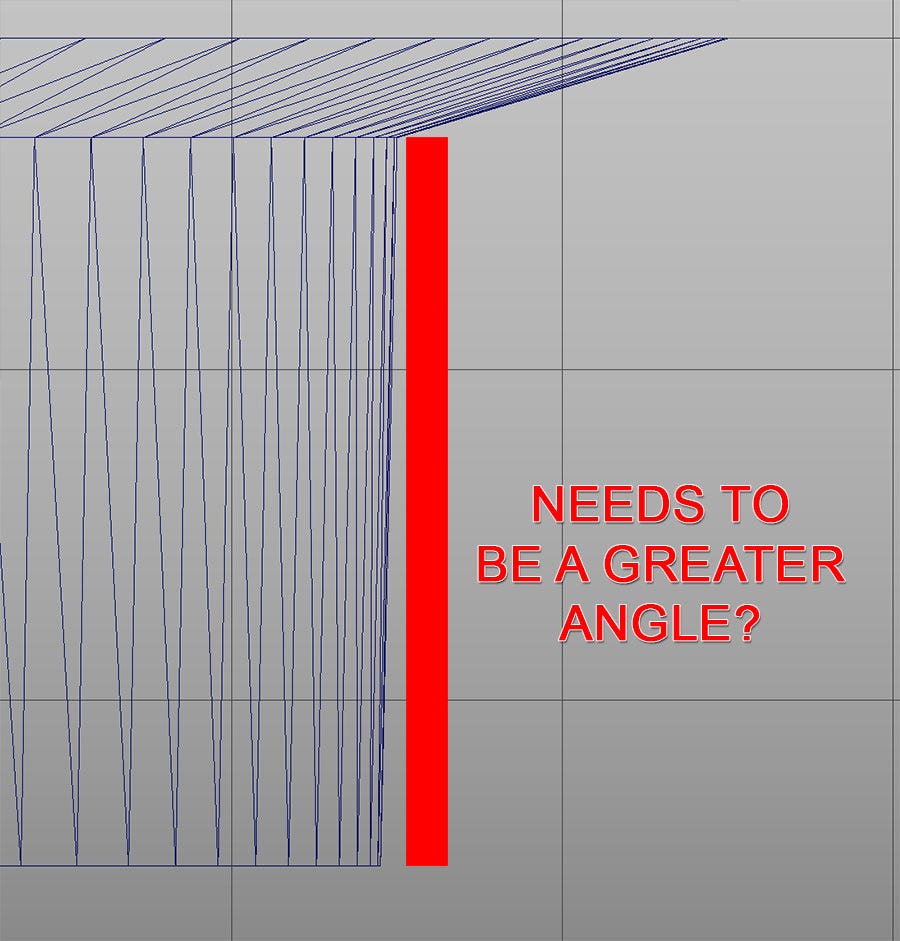
The main part of the wheels, which contact the rails, have a slight angle to them; having a larger inner diameter than outer. This is a way on real world trains. Is it needed on models? The angle I added matched the metal wheels I have, but I’m thinking the exterior diameter will need to be even thinner. It doesn’t look right to me.
Lastly, there’s the question of how to connect the 2 wheels together post print. I don’t want any supports on the exterior of the wheels. Support residue can be filed, smoothed and becomes practically invisible once painted. That’s no challenge! It’s also extra work and with prints this small I’m worried the sanding would take away detail.
I split the model in 2. Once piece consists of a wheel and axle, the other is just a wheel. This way they can be printed with the outside of the wheels facing upwards without supports. How to attach the wheels together?
Not a problem. I extended the axle to penetrate the loose wheel, then made a cavity for it to slot in at a depth of 1.07 mm. Why that distance? It looked about right.
The hole needs to be larger than the axle for it to slide in. It will be glued in, but shouldn’t be too loose or it will create a wobble. Too tight and the pieces won’t slide together.
I have little faith that consumer 3D printers will be as accurate as the specifications proclaim. I created a cavity 0.06 mm wider than the axle. That’s 2 layers when printing at 0.03 mm. I would like it tight before gluing. Not enough? Can the printer handle it? We’ll see.
Supports
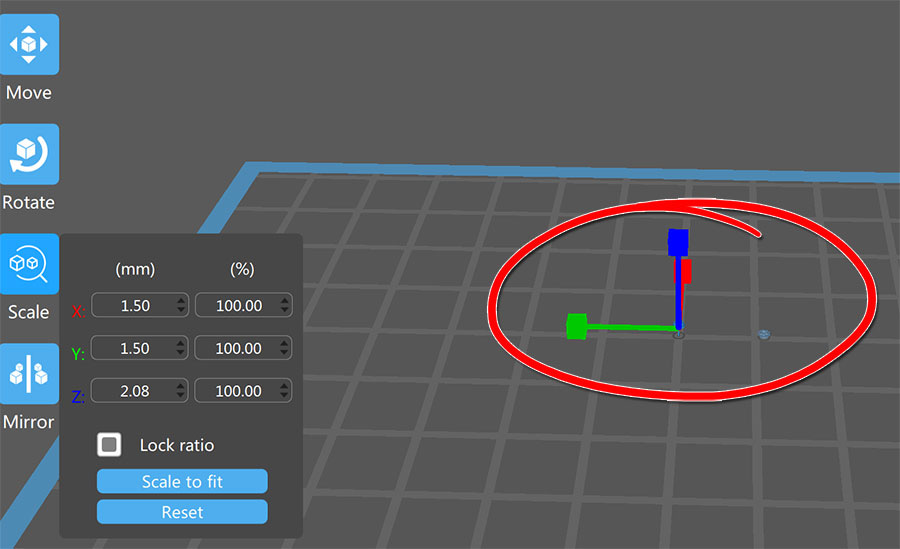
Despite drawing the wheels to scale in millimeters, when imported in to Chitubox they are 1/10th the size they should be. Not sure what’s up with that but it’s easily fixed. I scaled each part to 1,000%.
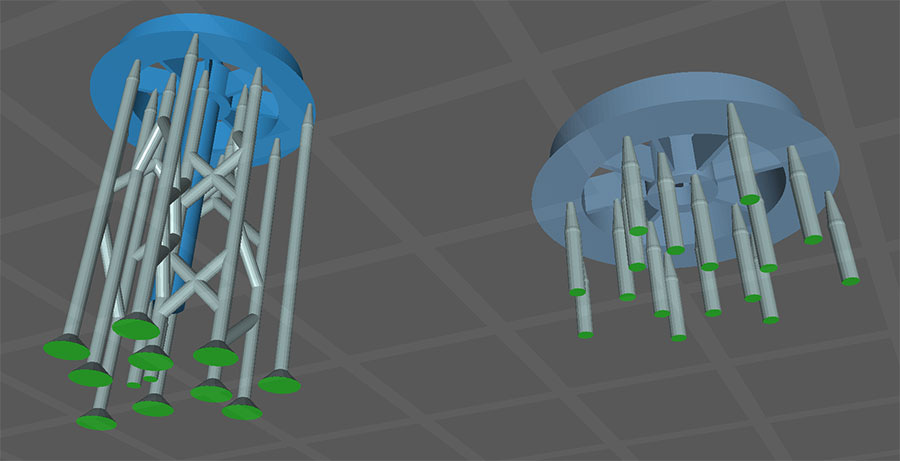
As the mesh is tiny I used light auto supports with no raft. My thinking being the mesh is tiny, it can’t weight much. So why would it need bigger supports that would require more sanding and waste resin?
The consensus in 3D printing circles is to never use auto supports in Chitubox. 99% of the Internet is lies, so I’ll take a chance. Previous prints I’ve tried all came with supports so this is all new to me.
Resin tank filled. Model exported. Let’s see what happens. Worst thing that can happen is it fails. I’m sure I’ll get over it!


