Successful(ish) Clamps
Previously… the axle clamps were far too small on my new chassis design. It was useless.
I made them bigger.
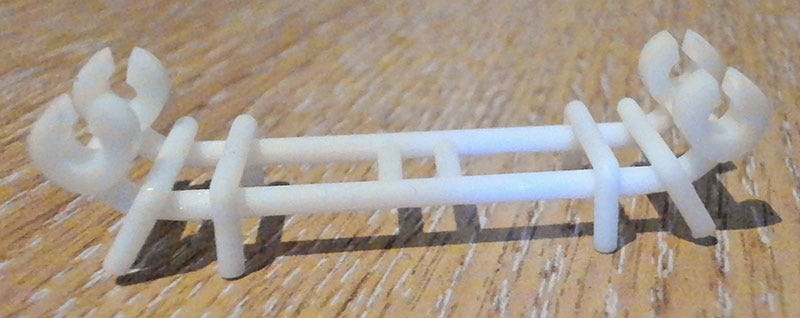
Too big? That’s what I thought when designing them in Maya, but when printed and placed next to a set of axles they look perfect. The rest of the chassis is very flimsy. Not that it matters this early in the design process. Or does it?
None of my axle sets would politely pass through the clamps. I didn’t want to snap another model, so broke out the file and began grinding. Enough was shaved off the inner clamps so that, with reasonable force, an axle could be slid in.
I tried my metal axles first as I was concerned the force required to push them in may snap my printed axles. Yeah, the clamps are still rather tight. Can you guess the next problem?
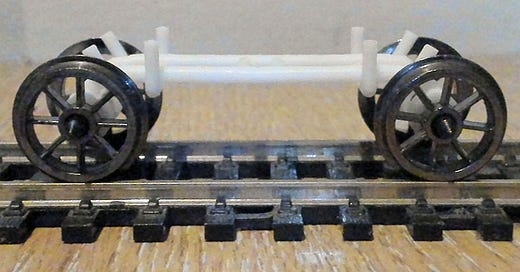
The axles fit perfectly. There’s just enough wiggle room for them to breathe. I can hold the chassis up, flick the wheels and they spin freely.
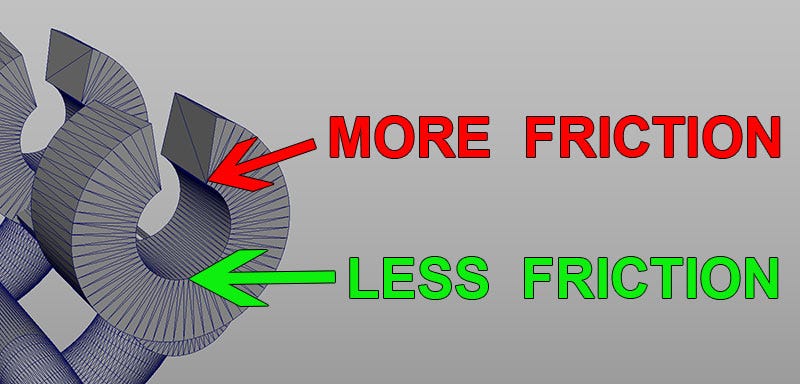
Of course the clamp design creates more friction than axles which join through spikes at the outer hubs. When holding the model upright there’s more friction than when held upside down. This is due to the open area at the bottom of the clamps which creates 2 contact points.
Which isn’t a problem when the model is upside down, like it would be resting on a track, because there’s a single contact point with the axel touching the top of the inner clamp.
At a guess, I would say there’s maybe 20%-30% more friction with this clamp design. It’s not an insignificant amount. Given the 3D printed chassis will weigh a lot less than a conventional chassis, I don’t see it being enough of a hindrance as to abandon the project.
In a box of junk I found an old spray can of primer which I used to fix up some scratches on my car years ago. It has a little life left in it, some of which was used to spray one of my printed wheel sets.
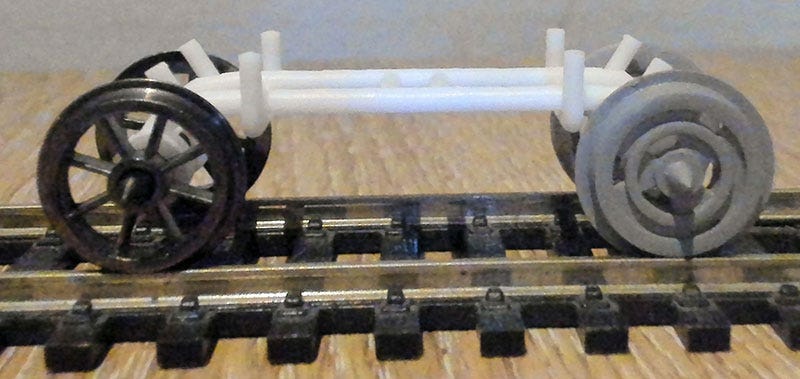
My printed wheels fit. Woo! I think look pretty cool and spin rather well, though not as well as metal axles. Which could be a problem.
I was worried the printed wheels would struggle to rotate. They look smooth but that doesn’t mean they are. As stated earlier, metal axles in a printed chassis feel like they have 20%-30% more friction. Printed wheels in a printed chassis feel more like 50%-60%.
That sounds like a game changing difference. Is it? I flick the printed wheels and they continue to spin for a while, just not as long as metal axles do. If a layout had lots of hills or printed carriages, the engine could require a little more pulling power?
I don’t think it would due to the weight reduction with printed carriages. My printed wheels are in a chassis, I push down on it with a decent amount of force and roll it along a track. The wheels turn fine. They’re no slipping as I thought they might. it’s not perfectly smooth but it’s good enough for my purpose; to have fun.
Maybe some glossy paint would smooth the contact points. If the friction becomes an issue, that’s something to look in to.
Reminder; my prints aren’t made for high speed or continuous long term use. Although now I want to do a speed test!
More Friction
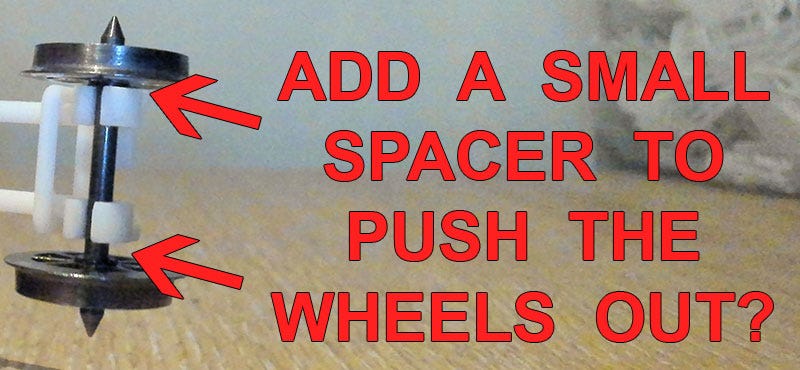
The clamps will rub against the axle as well as the insides of the wheels. Only 1 wheel at a time, as the chassis shifts horizontally through regular movement.
This can be reduced by creating a small space on the outer side of the clamp. It doesn’t seem to be a massive hindrance, but is still more friction than a traditional axle spike connector design.
If a connector is added, it can’t be too wide as a slight gap is require to keep the spinning. Obviously both wheels can’t be in contact with the clamps all the time. The wheels wouldn’t turn at all. Derp.
Whoopsie
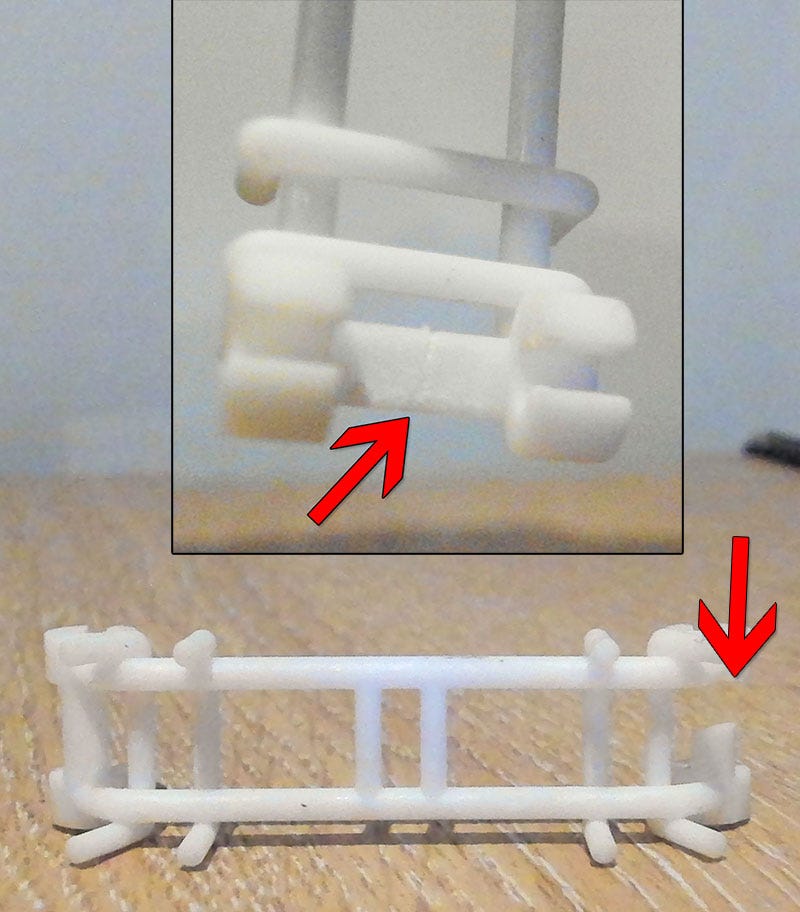
Remember when I said the chassis was fragile and…
…that happened when trying to remove a set of wheels. It’s a brace connecting the clamps, designed for stability and the prevention of chassis warping. It’s a simple enough task to make it thicker. So long as the brace doesn’t touch the axle, it can be any width.
Alternatively I could Shave a few microns off the clamps, both in Maya and once printed, until everything fits together with less force.
Isn’t this all overkill? The only reason it snapped was because I repeatedly changed wheel sets for testing. Who would be swapping out wheels that frequently? Or at all? I would think people put in a set of wheels and never thing about them again?
Oh, Yeah…
A major drawback to the clamp design is one I didn’t expect; axles have to be cylindrical. Crazy, I know. Only a toddle could have predicted this.
Looking through my job lot of crap from eBay, I came across a carriage that has rectangular metallic axles. It wouldn’t matter in any other chassis because every one I’ve comes across connects via spikes on the outer hub. This is a me problem.
What’s the fix? There isn’t one. Square axles won’t work with a clamp design. Don’t square axle sets.
I wasn’t expecting rectangles.
Summary
The clamp design causes more friction. A printed axle with printed chassis causes even more friction. Wheels still spin freely, or at least to an acceptable degree. 360 of them. I would call this a success.
Meanwhile dent heads on garbage SJW platforms like Reddit were saying printed wheels don’t work. There’s a lesson for you; don’t listen to idiots who are too stupid to 3D print a simple wheel. Seriously.
Stripping the clamps back a little more won’t cause the axles to fall out when a carriage is picked up, so that’s on the list of improvements. It’s not a problem if they remain their current thickness. If required, they can easily be filed back in a few seconds.
I’ll also make a note of the brace thickness for future prints. This was only a template with some random piping thrown together so the chassis didn’t collapse on a track. In the future I’ll remember to strengthen any area which may flex when fitting axles.
Now I have measurements and a working template, I can move on to my second style of chassis. Once which connects via spikes on the outer hubs, making my clamp design redundant.
…it’s not. I still like it and will use the clamp design, but that doesn’t mean it’s my only design!


