This is Why I Wanted to Print My Own Trains
I said the goal of these posts was to create unique designs. Trains are boring, that’s a major reason why the hobby has been taken off life support and is seconds away from burial. Kids today don’t care about passenger cars going around in circles or the same designs from 40 years ago reissued at 5 times the price.
We live in a world where computer games have taken over as the primary hobby because they offer something these real world toys are lacking; imagination.
I’m quite proud of this one. Good luck painting it!
If you think there’s no way a 3D printer, let alone my 2k Mars 2, can handle this… spoiler…
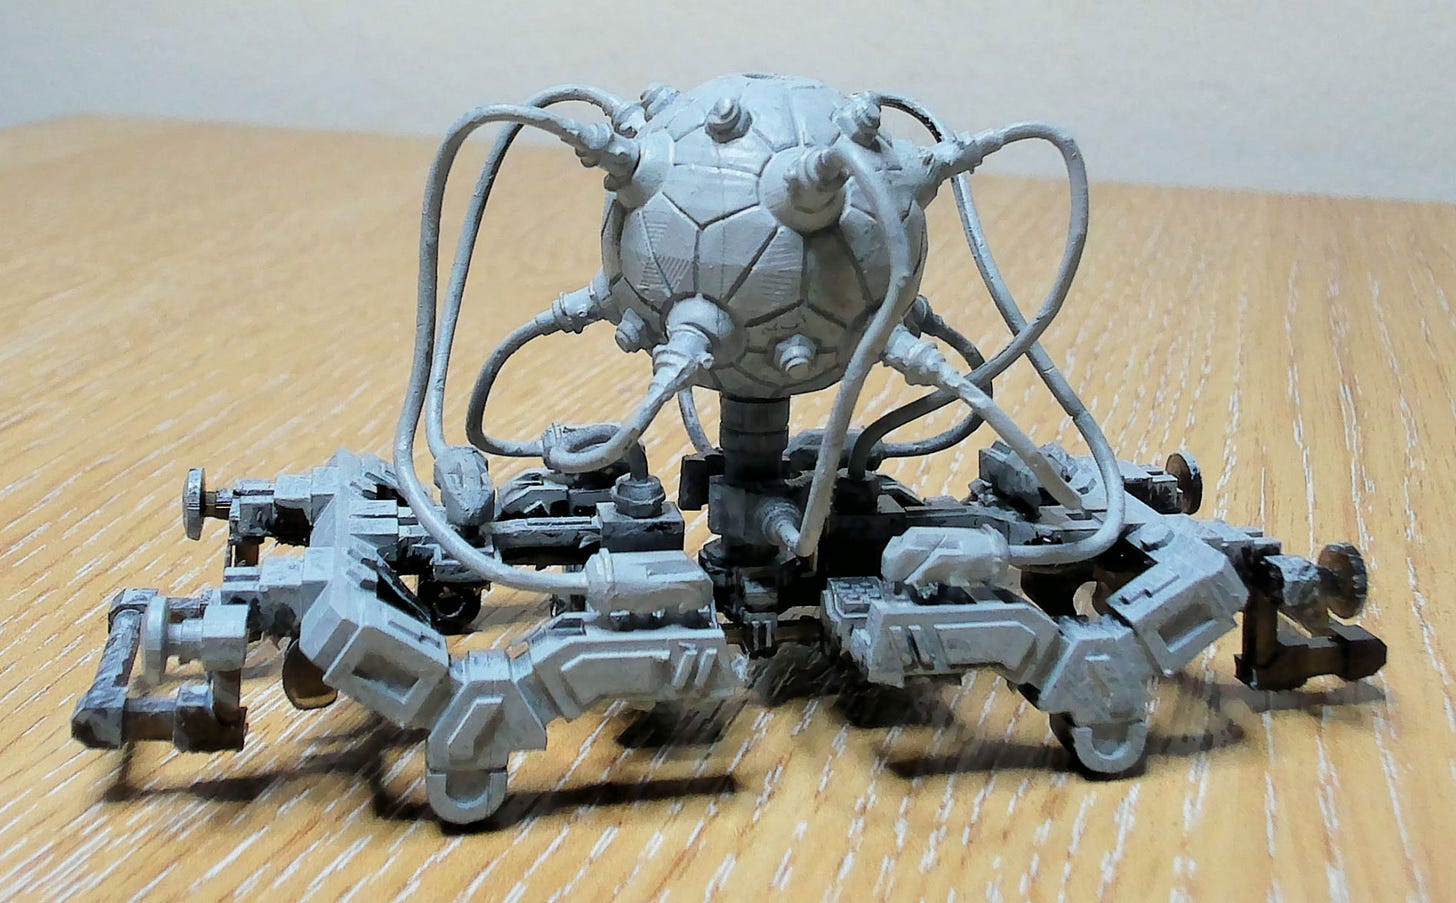
Total length is 81mm if that helps comprehend the scale.
Again, I threw on a little primer in a few areas to show off details. Black resin was cheaper but terrible for pictures. It was also a speed print, hence the layer banding.
This was one of the first prints I tried using this black resin, not made by Elegoo. I think it was some Amazon own brand? The printer settings need adjusting for future prints as there were minor issues with the final product. I’m very happy with the resin for prototyping, but that’s why you may notice a few issues.
Seriously though, it’s not too hard to paint. I’ll get on to that later.
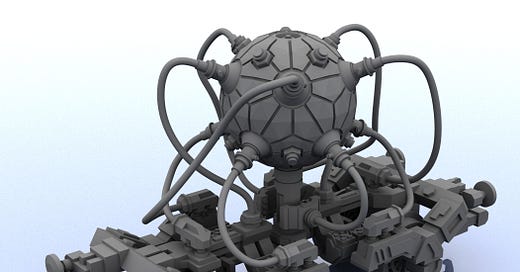
The idea behind this design was for a sort of external nuclear reactor. Possibly a bomb? Whatever your imagination wants it to be. Main parts are:
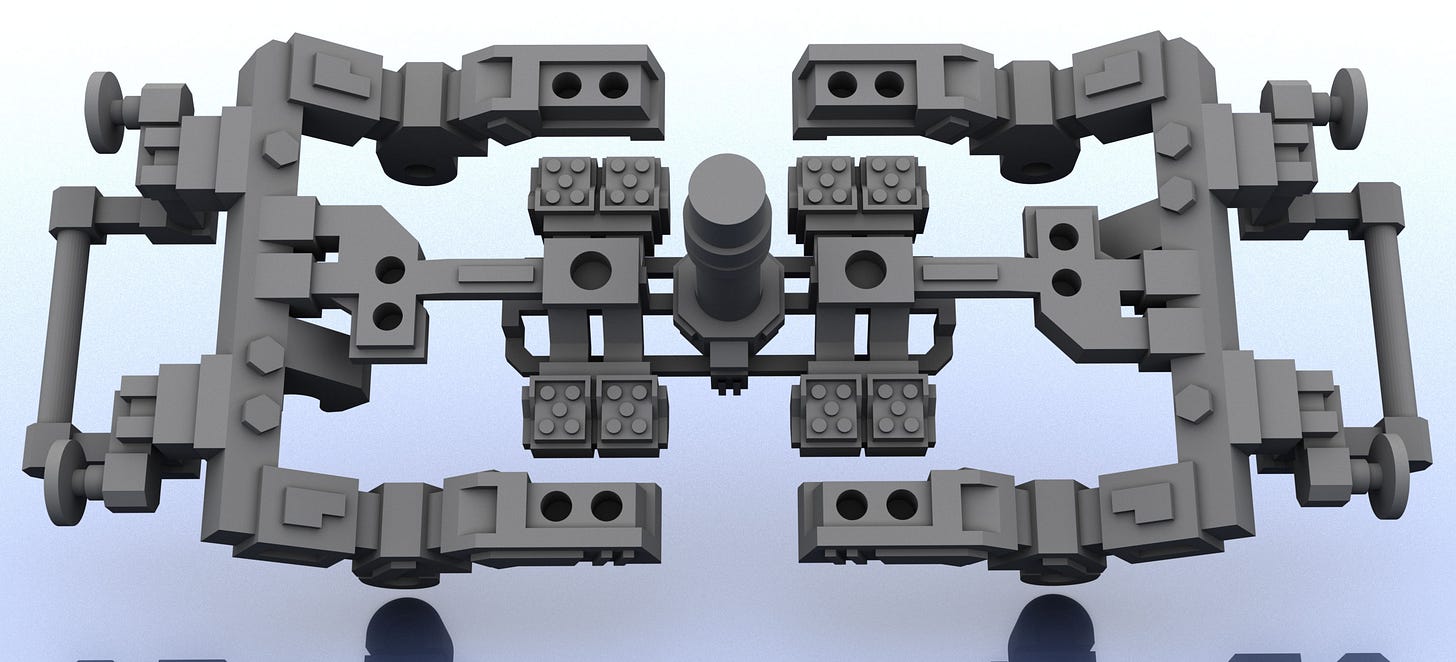
Chassis
Reactor core
10x connecting wires
Wheels and bar hooks (not printed, generic components, shared between designs)
I wanted an open chassis with a floating reactor core. Obviously it can’t be floating in reality, so I added a central pillar underneath. The pillar is the main support, with 8 of the 10 wires acting as sub-supports.
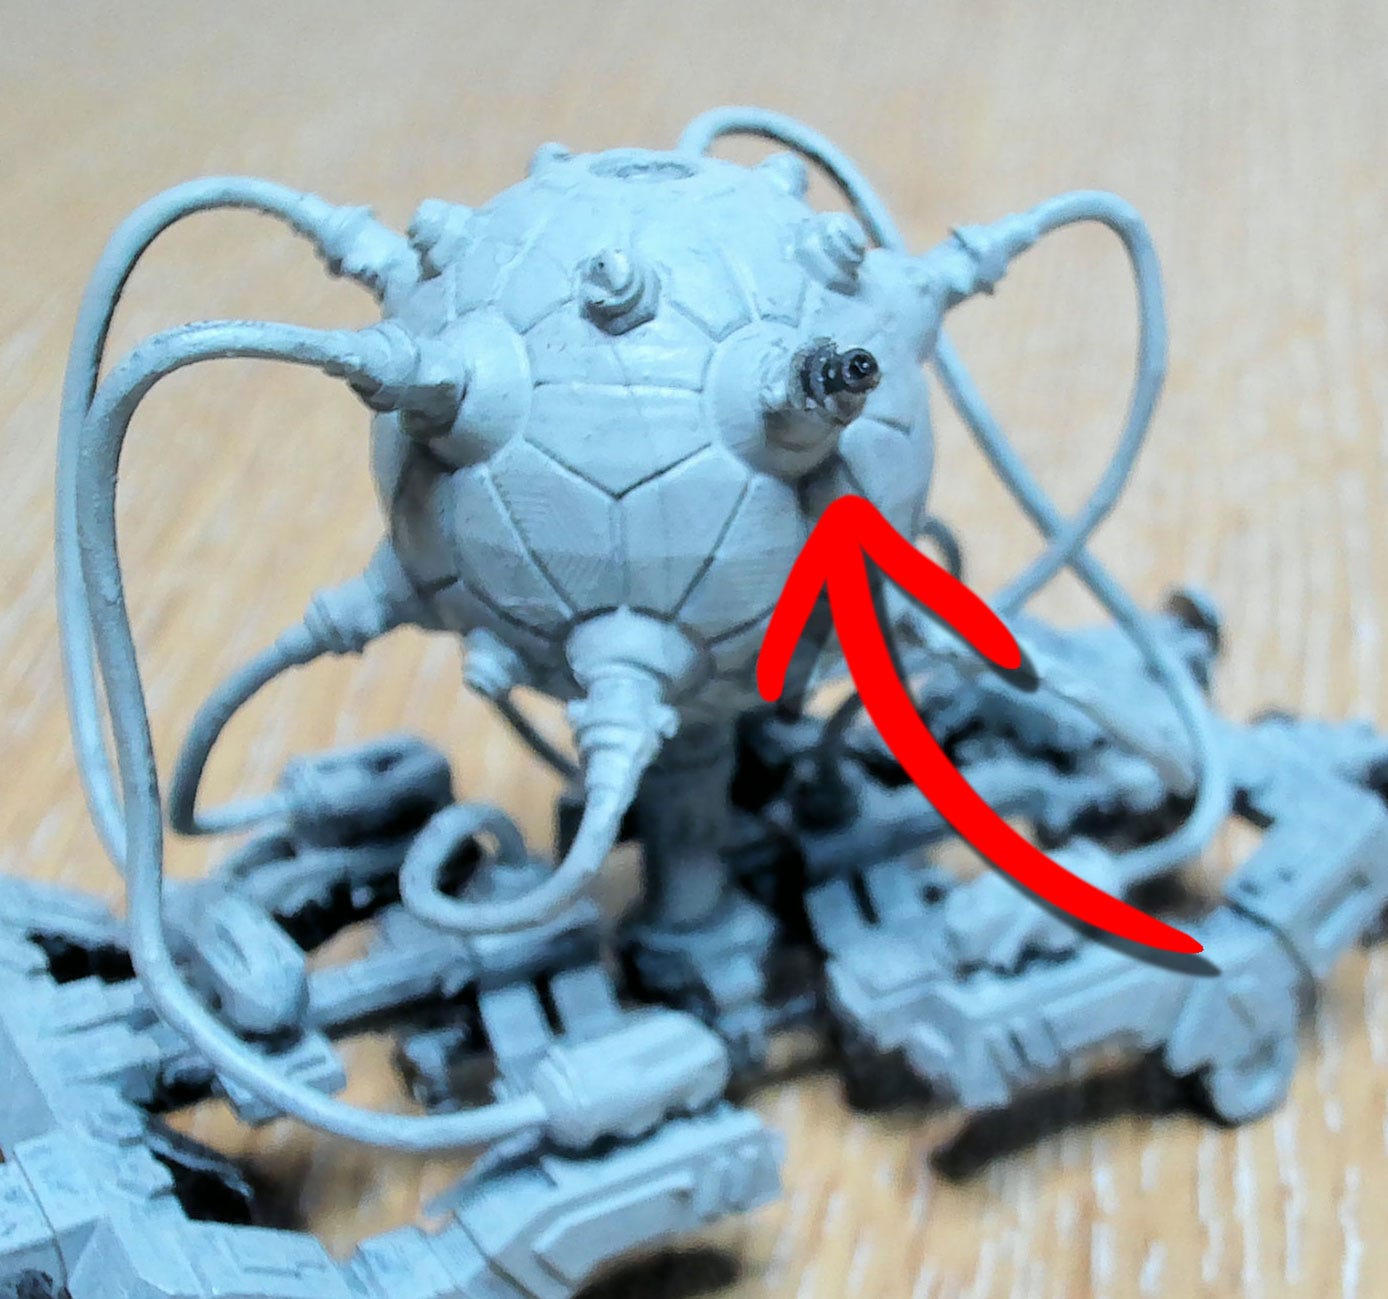
Out of the 10 wires, only 8 connect to the chassis. The 2 in the middle have clamps on the end, stylised to grasp the pillar but not touch it.
Obviously this mesh is printed in sections then glued together with guiding holes. Makes it easier to print and parts can be substituted if broken or there’s an error in printing. It’s remarkably study. Dropped it from a short height more than a few times and nothing has snapped. So far.
…OK, so the morons I work with had a stupider than normal day and I threw my headphones across the desk. The wire clipped the mesh and launched it along with my, still working, headphones. Was too much stress for the wires and 1 of them snapped off.
Only 1 and it can be reattached with glue simply enough. The wire in question was a central clamp, not a support. Which makes sense why it broke off; there’s only 1 stress point.
It’s not indestructible, though should have survive a few derailments when cured thoroughly with more flexible resin. It lasted for a few months without any damage. Takes me a while to write these articles. I’m busy. Always busy.
Chassis
This model is intended to be futuristic, so I made a square chassis design. I hate making organic meshes so was happy to work with squares.
The chassis is as flimsy as it looks. Particularly towards the center where there are only 3 small beams connecting the left and right areas to the central pillar. This causes minor flexing, but only if you try to bend the mesh. Don’t bend it. Problem solved.
Despite only being connected on the outer edges, they don’t meet in the middle or have crossbeams, axle braces are very sturdy. Nothing to worry about when attaching axles. Enough flex to fit them easily and enough rigidity so that they don’t fall out.
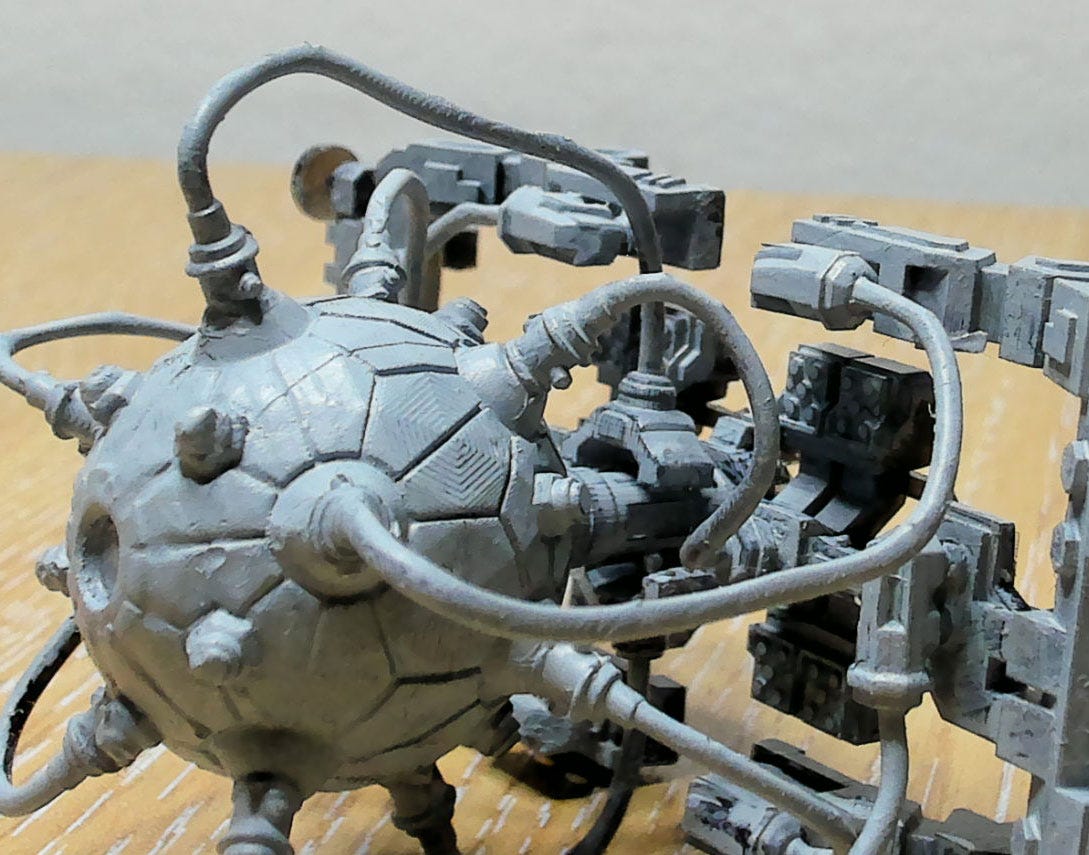
8 wires (glued later) link the spherical core to the chassis to increase rigidity. Not by much, they’re very thin, however they take pressure off those small beams in the middle.
This black resin I switched to feels more solid than the Elegoo stuff I’m used to. Once I glued the model together, it felt solid. There’s still a decent amount of flex around the middle but it doesn’t feel like it would snap from simply running on a track.
Details on the chassis printed perfectly. One of the axle mounts didn’t print at all so I couldn’t fix a pair of axles and see it running on a track..
The Core
Tricky. Very tricky due to tolerances.
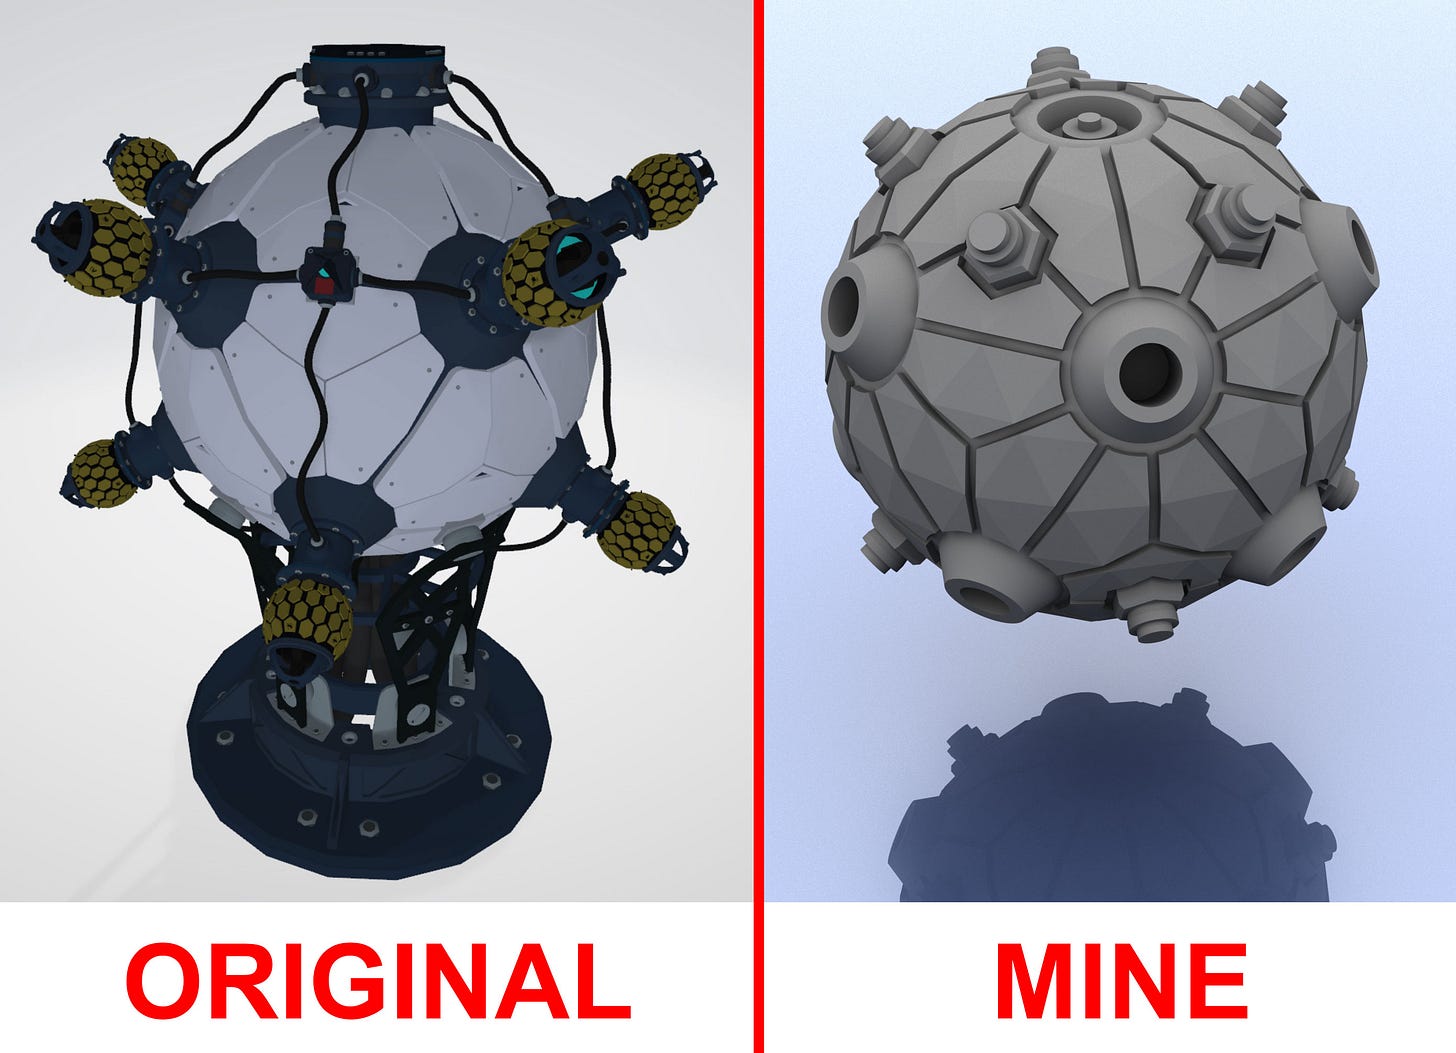
I found an existing design online and thought I could use that to save time. It was a mess. I’ve mentioned this before but want to hammer it in to peoples heads… if you want to 3D print, learn to 3D model.
These downloadable designs are fine for animations but worthless for 3D printing or games. Which is what 99% of all models are used for. Poly counts are usually too high, there are mesh details where none are needed, textures where mesh details are needed and objects overlapping in… wrong ways.
Despite being of no use, it provided me with a good reference for scaling.
The printed sphere has a diameter of 21mm. I couldn’t add too much detail because I only have a 2k printer. Although, since I made the model correctly and saved in increments, I can easily increase detail later if needed.
There’s a hole in the bottom where the central pillar slots in. The holes around the edges are where the wires slot in. Assuming everything prints accurately.
I tried to leave at least a 0.6mm gap with the holes. Although this will mean holding objects in place a little longer while the glue dries. There’s a trade off between having fittings so tight objects may snap fitting them together and being so loose they’re impossible to line up. Once everything will be glued in place, glue which will help fill in the holes.
Wires
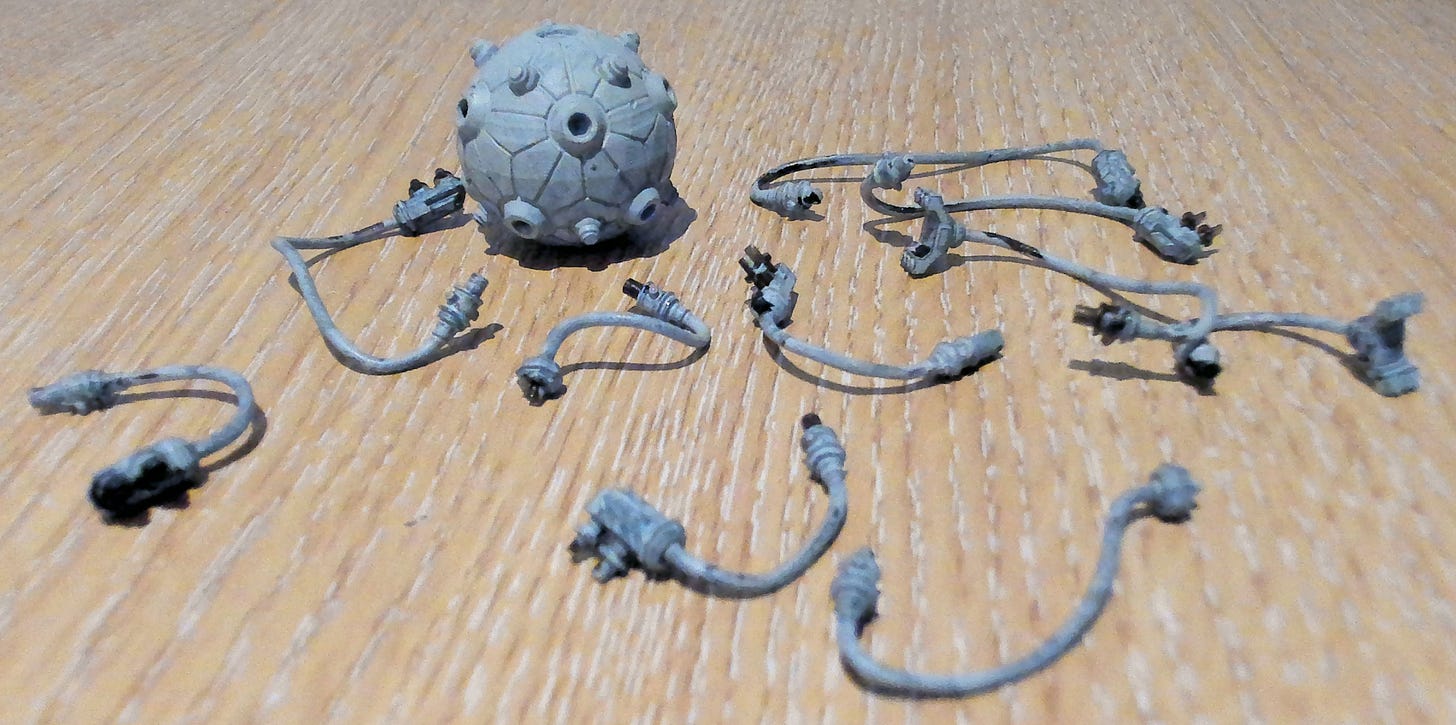
My biggest concern with this design was printing the wires. There are 10 in total, each of varying lengths but with a consistent diameter of 1mm. The end pins, which slot in to guide holes, are half that at 0.5mm.
Perfect print. First time.
I checked all the objects slotted together before printing. Nothing needed sanding or adjustment. For once I got my measurements right. Must be learning.
How does all this fit together? With time. Lots of time. Each wire is unique and fits to the model in a specific location. They are very hard to tell apart. I ended up laying the model out on my desk and using the 3D model in Maya as a reference point.
A workaround would be to add unique slots to each piece. Then each piece could only fit in to a specific hole. With a scale of 0.5mm on a 2k printer, I’m not confident that’s a good idea. If either the hole or pin (maybe I use different lengths of pins in sequences?) don’t align properly then something will need to be printed again. Possibly the entire chassis? That’s a lot of waste.
There’s no benefit to creating unique fittings beyond saving a few minutes identifying parts. Perhaps I could create a 2D top-down blueprint of where the wires attach? The method would then be to simply print the outlines and match them to the 3D printed parts. Sounds like a plan if I were to ever sell these.
Finally
With the wires glued and set, it’s more rigid than I imagined. It can be picked up by any of the wires and they don’t feel like they’ll break. Although they can be broken if you throw headphones at them…
One of the axle hubs didn’t print correctly so I can’t attach both sets of wheels to it. However, I can attach 1 set of wheels and balance the model between 2 pieces of retail stock…
It looks a bit small in the picture but I like the scaling, so maybe it’s perspective? The hook system works perfectly. They’re holding the vehicle up with only 1 axle attached. I’m also using 1 of my printed wheel sets because I didn’t have any spare metal wheels.
In terms of detailing and scaling, I wouldn’t change a thing with the model. Very satisfied. Everything fits together, the hook bars hook, axles fit, it feels rigid and looks great.
Well I think it looks great. Would be better if surrounded by similarly designed futuristic stock.
The hook bars feel a little too tall, though it’s minimal. Maybe 0.05mm? I’ll decide after a fully successful print with some metal wheels.
Going Forward
I have a few more hopper designs lined up, but I have a certain hopper design which may be more interesting.
Or maybe… to avoid copyright infringement… my battle mallet designs?


