The Idea
I bought some very cheap job lots of old and damaged 00 goods off eBay. The idea being that I needed templates for scaling and verifying compatibility with my prints. No point designing a new coupling system if it can’t latch on to existing carriages because the proportions are wrong or it’s a different height.
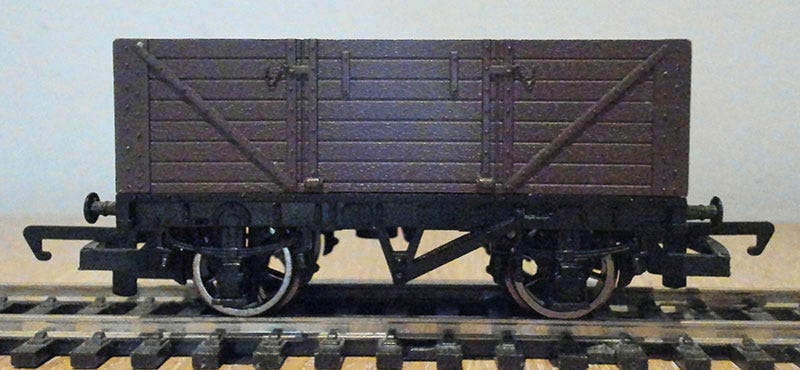
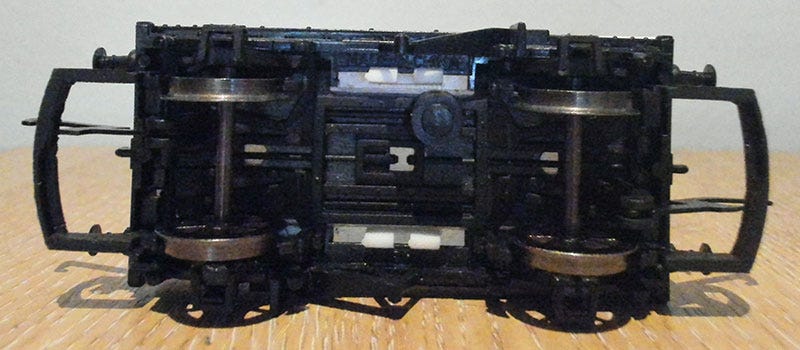
One lot contained a specific wagon type I was looking for:
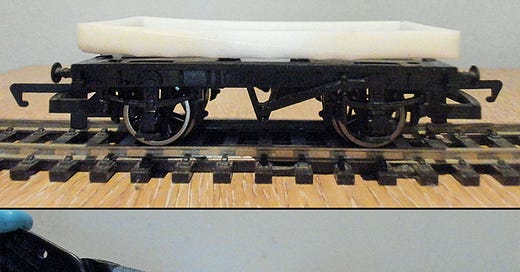
Very basic, everyone should have a few of these laying around. The brown part is held on to the black part by 2 hooks. There are small guiding holes and bumps in each corner too.
If I can use the black part as a base, then all I need to do is print the brown area and I can easily swap them out. Why not print the whole thing as a single object? Well I like how the underside looks, but that top area feels very fake. I would like some distortion in the wood, maybe a few holes and a working latch door?
That extra detailing is a little much for now. All I want is to print a simple flat base to ensure my calculations are correct for corner holes and the hooks. Once everything is aligned and the hooks are stable, I’ll put my creative hat on.
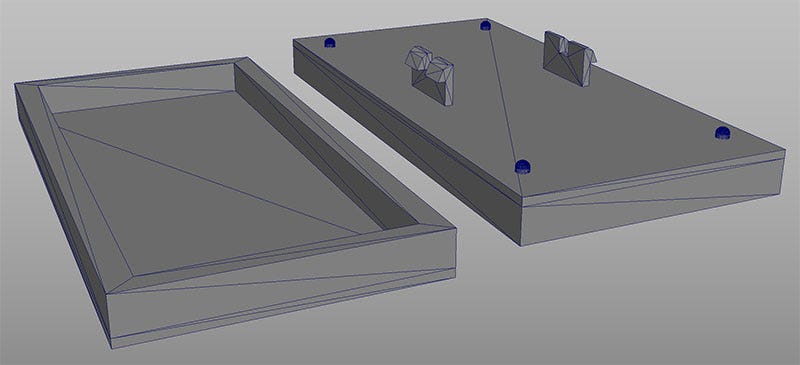
The process was pretty simple. Open Maya, measure holes with a digital caliper, create some basic shapes, move them around, export, add supports and print.
Here is my design:
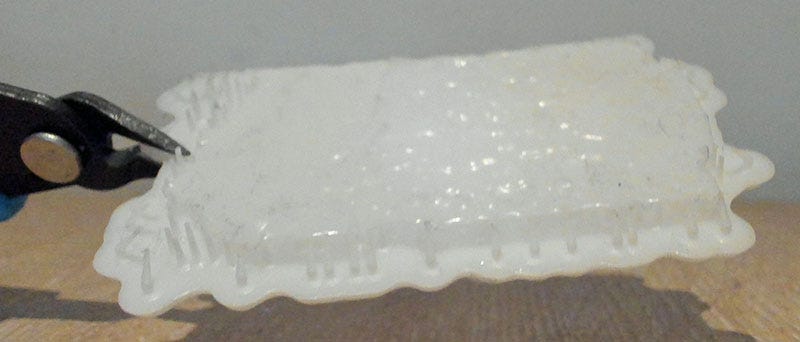
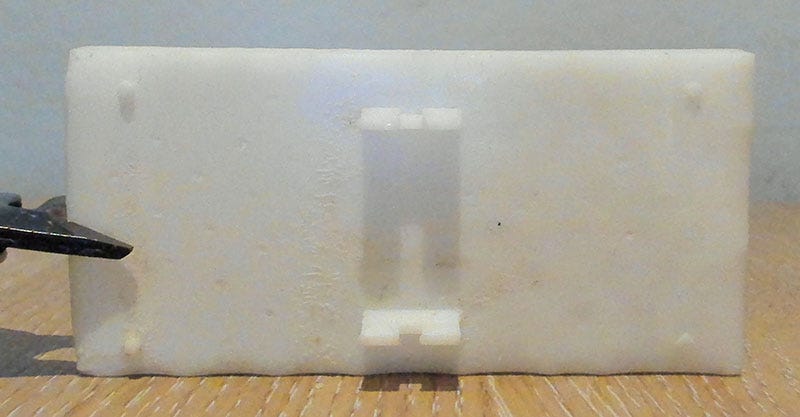
Here’s what printed:
Not exactly like the model.
In my previous post of this series, article #6, I noted my wheel print failures may be related to the vat screws being too tight. Well I tried printing this before loosening the screws because I write these articles while printing something else. Passes the time!
If you can’t tell by the pattern, the supports were added in PrusaSlicer. It’s a decent program but I’ve found it adds far too many supports, struggles with very thin objects and seems to have a higher failure rate if using rafts.
Perhaps it failed due to height? The large flat area is 1 mm deep, which seemed more than enough given it was printed at 0.03 mm. Maybe not?
Apparently I should also be printing the model to reduce large flat surfaces. However this adds quite a bit of time to the print and it’s only for prototyping. At this point I would be happy with anything resembling a successful print. There are no reference points on the failed mesh that I can use to verify if my measurements are even close.
Take 2
Actions taken:
Increased layer size from 0.03 mm to 0.05 mm. Will speed up the print. It doesn’t need to look perfect at this point, I’m happy with banding.
Added raised borders to the edge, which I should have done the first time around. This is further indication as to how accurate my measurements are.
Manually added supports and ditched PrusaSlicer. My printer seems to struggle with supports and rafts from that program.
Did it make a difference?
Much better. Probably nothing to do with PruseSlicer and was just another random failed print that seems to happen a less than humourous amount of time with resin.
Now the question; were my measurements correct and does it fit to the chassis?
Despite appearances, the tabs are perfect for what I wanted. They hook on tightly. I can hold it up by the printed area without the base falling off. It has enough play to be easily removable. There are large gaps to either side because I was more concerned with the gripping action, so was conservative with the width of the tabs.
There is an issue I hoped wouldn’t happen though:
Warping can be mitigated, but never fully resolves. Fixes include:
Increasing layer exposure time
Slowing down lift speed
Angling the model so the flat surfaces are printing at an angle
Adding lots of smaller supports instead of a few larger ones
Reducing layer height seems to help a little
Each of these suggestions greatly increases print time. I can’t really justify the time increase when even this mess took almost 40 minutes!
Angling the model would be the most effective way to reduce warping, however it would add the most time. My idea with a modular chassis was for it to print faster than the entire model would in 1 piece.
By angling the mesh so drastically as to negate most of the warping, the height increase of a full model would be negligible.
If I designed an entire model, obviously without wheels, that would remove the requirement for people to source a base chassis. I could also be a lot more creative. With the increased detail I would add to the bottom of the chassis, there would be less of a flat surface to print and I could reduce the angle of the mesh; negligible print speed increase, less warping.
While this modular design is possible and was interesting to try, to me it makes sense if i print an entire body without any need for a donor chassis.
Wait a Minute
I got an idea when using PrusaSlicer as to what could be wrong with my failed wheel prints. Yeah, I can’t let it go.
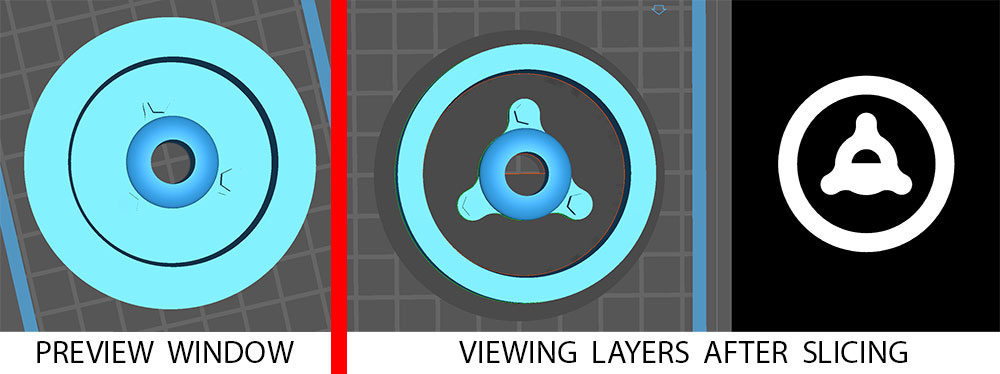
My Elegoo Mars 2 can’t print from PrusaSlicer. I need to export the supported mesh to Chitubox, slice from there and export to a format my printer can read. My models look fine when previewed in Chitubox and PrusaSlicer. So why are they failing?
Once sliced in Chitbox, you can view the slices layer by layer. I’ve never done this before as I figured it would be the same as the preview. It is not.
Once sliced, at least for this single mesh I tested, the layers were wrong; either missing faces or adding them in wrong places. It wasn’t my settings or model, it’s how Chitubox is reading/slicing my model. Mystery solved!
That’s something to investigate for post #8… more wheel articles!


