3D Resin Printing 00 Model Trains #17
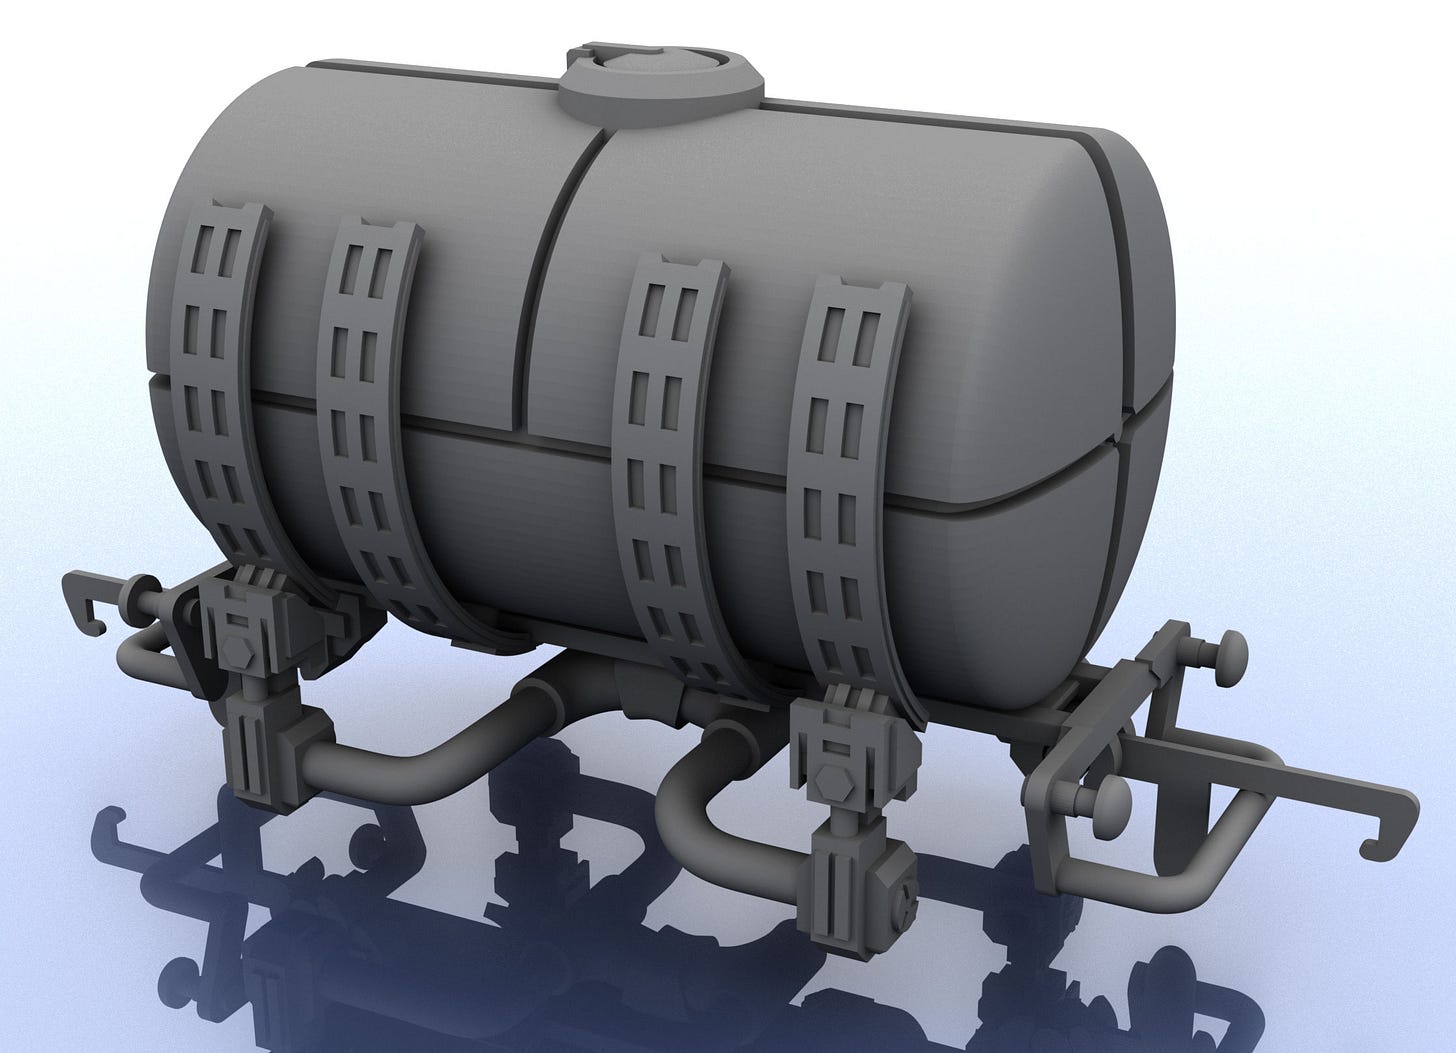
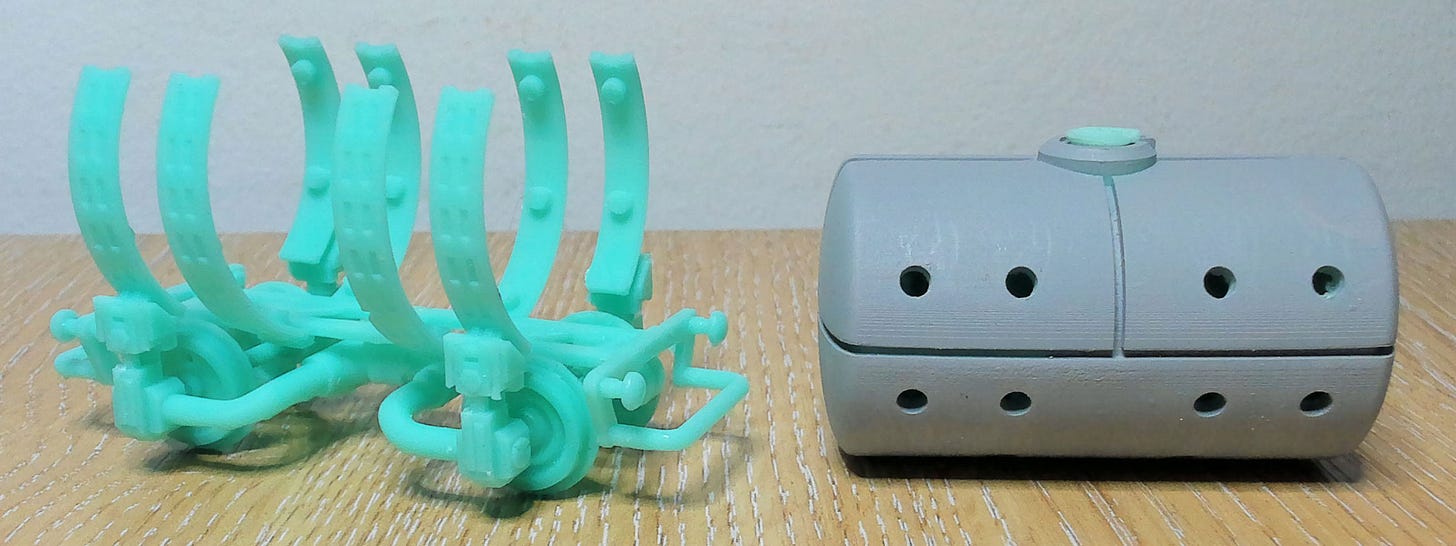
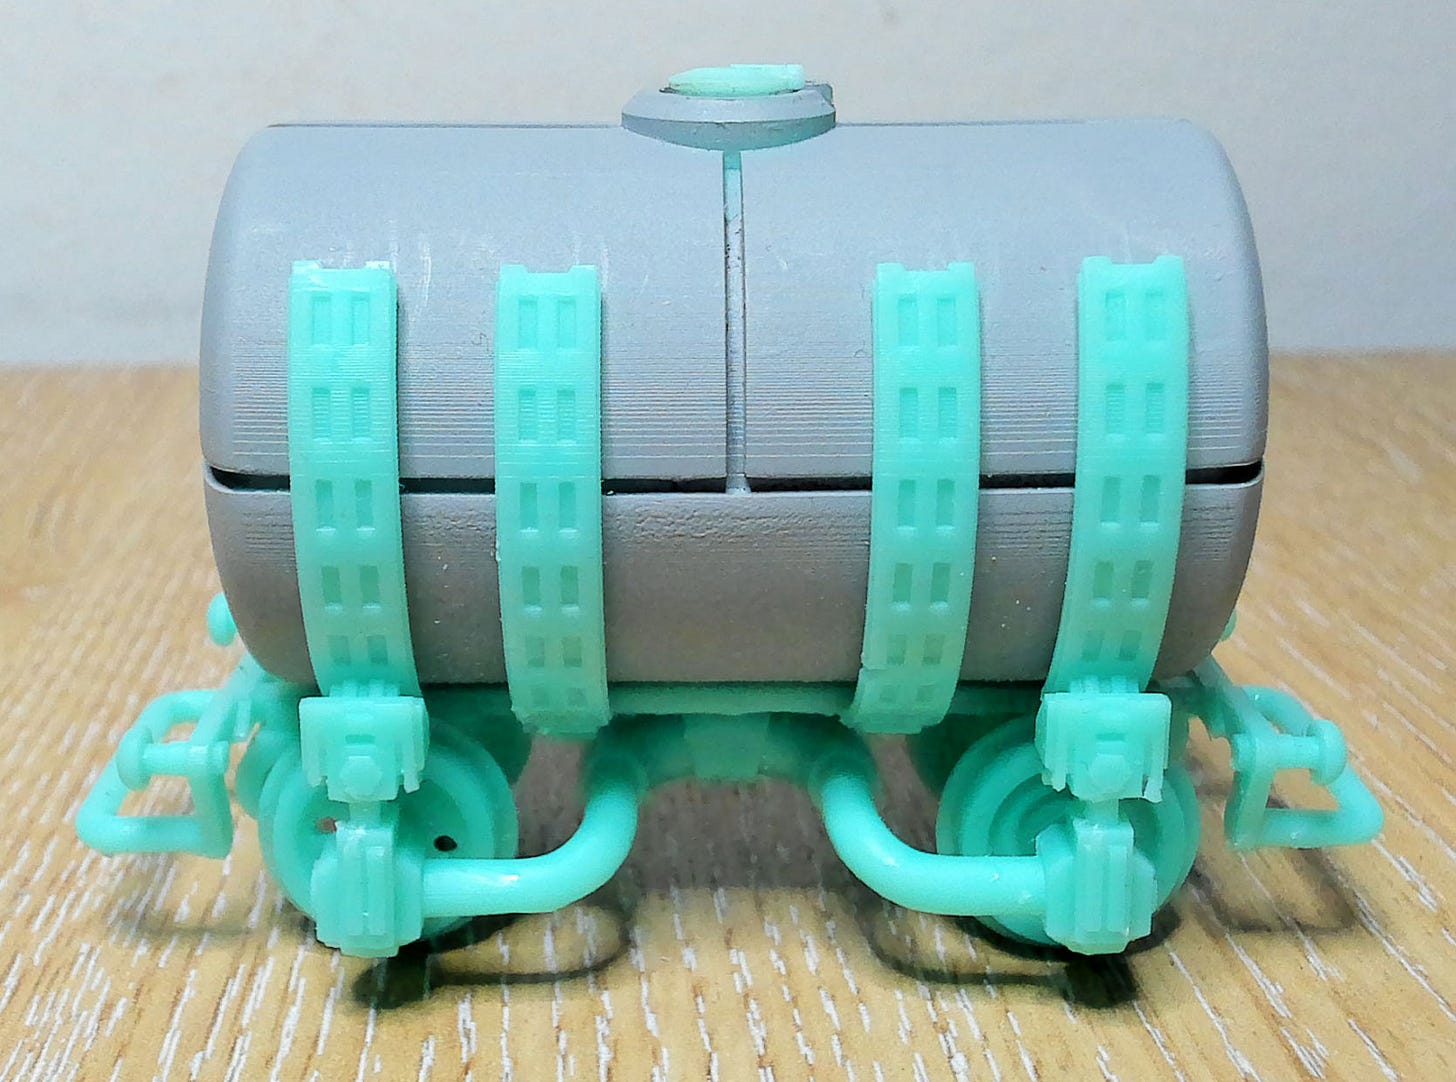
A small tanker with removable tank (eventually).
A Small Tanker
The hopper idea from my previous post was shelved. I wanted to make something more tricky than a box on wheels while I thought up more designs. What about a cylinder on wheels?
This is the first production model I made. In that it’s 100% working and I would consider selling. The chassis looks similar to the chassis from post #14 but is completely new. Only similar in style.
I wanted to build a small tanker. Something that would stand out as a model. How exciting can you make a cylinder? Most designs I’ve seen rely on unique painting and logos emblazoning the side.
Can you guess what the problem is?
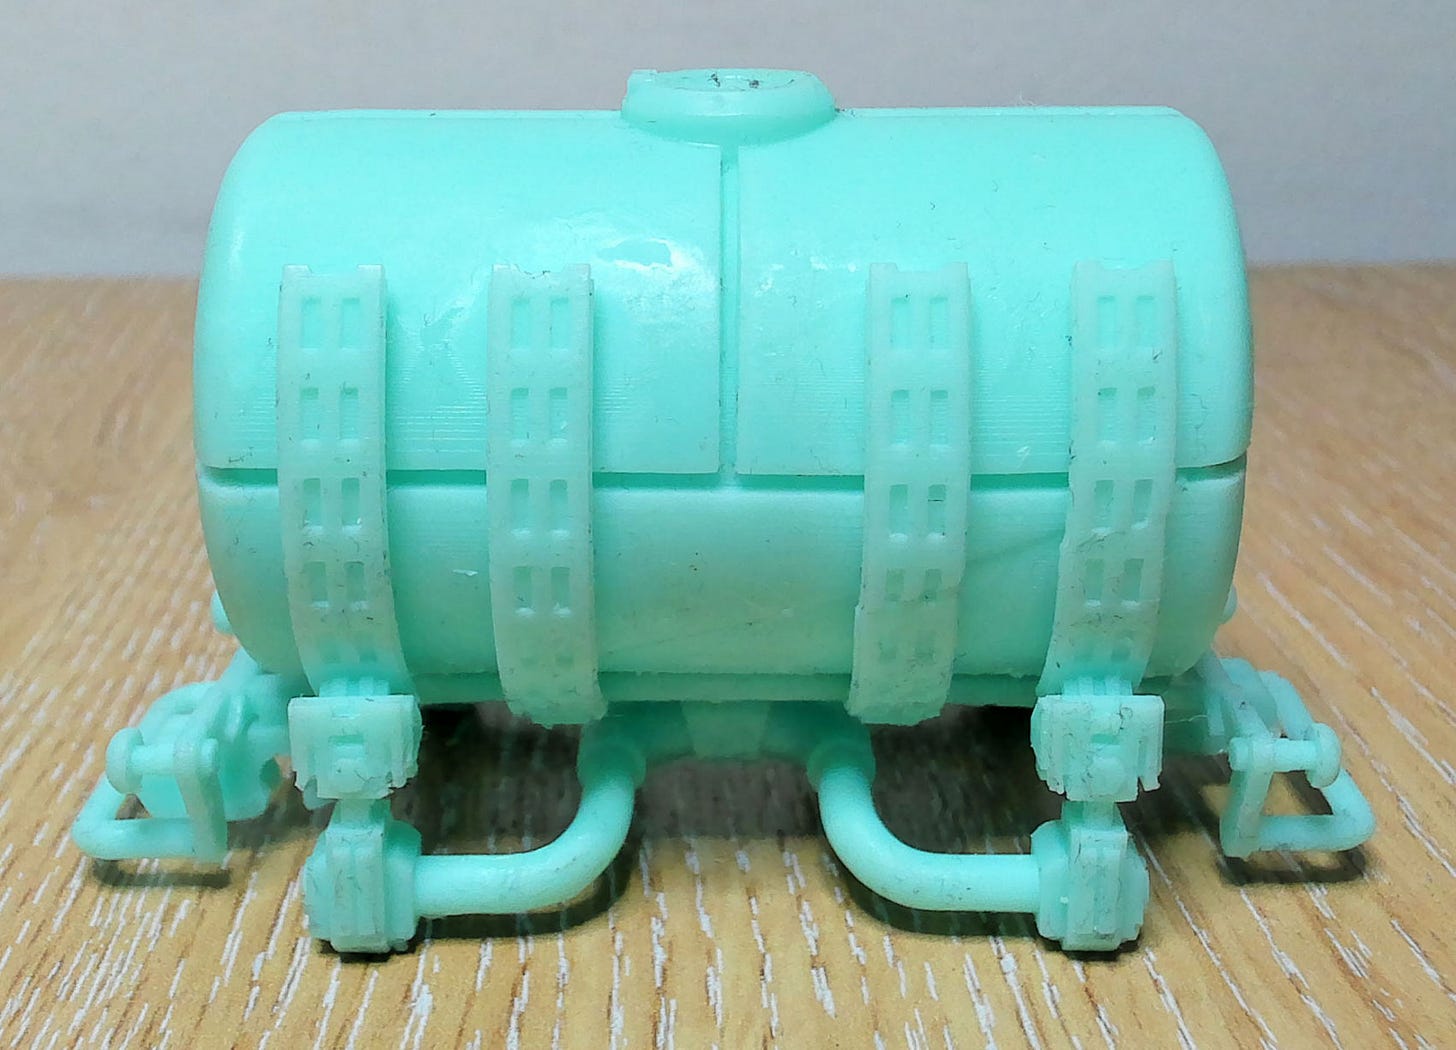
If you’re thinking I didn’t hollow the mesh, wrong. The tank is hollow with the hatch (printed separately) at the top being removable. Once printed I can drain the resin out of the top then glue the hatch on. Or push on as it’s a very tight fit.
This model has the same problem as with the previous post, though more exaggerated. Which is why I first noticed it with this design.
There were a few errors, however details came out as I wanted and the scaling was perfect. The problem is… how to paint it?
The object is a single piece with fine details. Even with the thinnest of brushes it would be impossible, or a monumental effort, to paint around the vertical supports holding the tank.
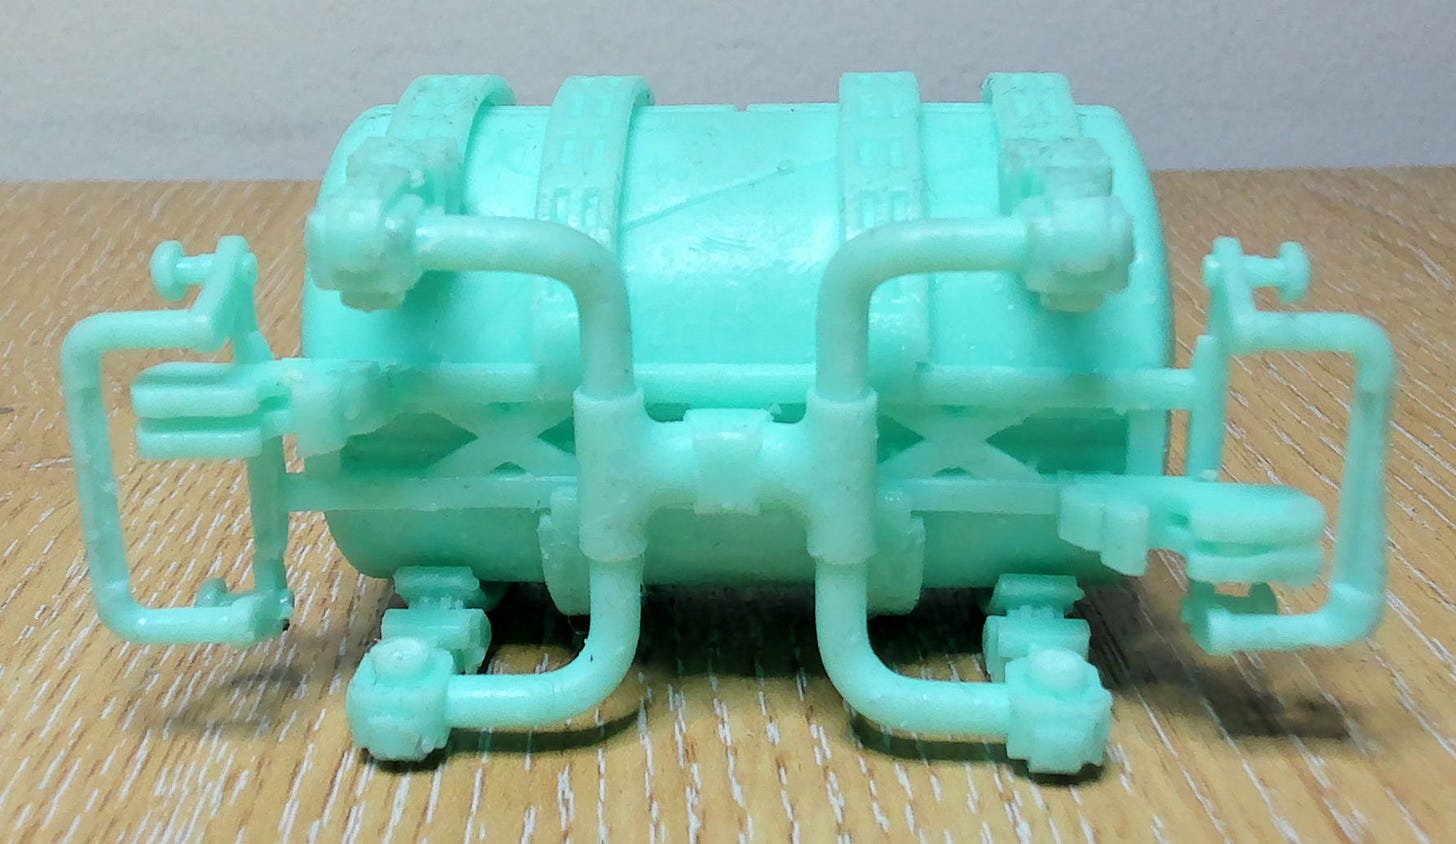
Underneath is even more problematic to paint. Doesn’t matter much as no one will ever see it unless the train derails. Then why make it so detailed? I don’t know. Maybe the person painting it is one of the few around that still cares about quality?
The benefit to making your own models, making them properly, is that they’re far easier to edit. Almost every model I’ve downloaded has had endless issues and taken longer to fix than to make from scratch. That’s a complaint for another post. You get what you pay for.
Having built the model correctly, the fix took seconds!
A Small Tanker… With a Removable Tank
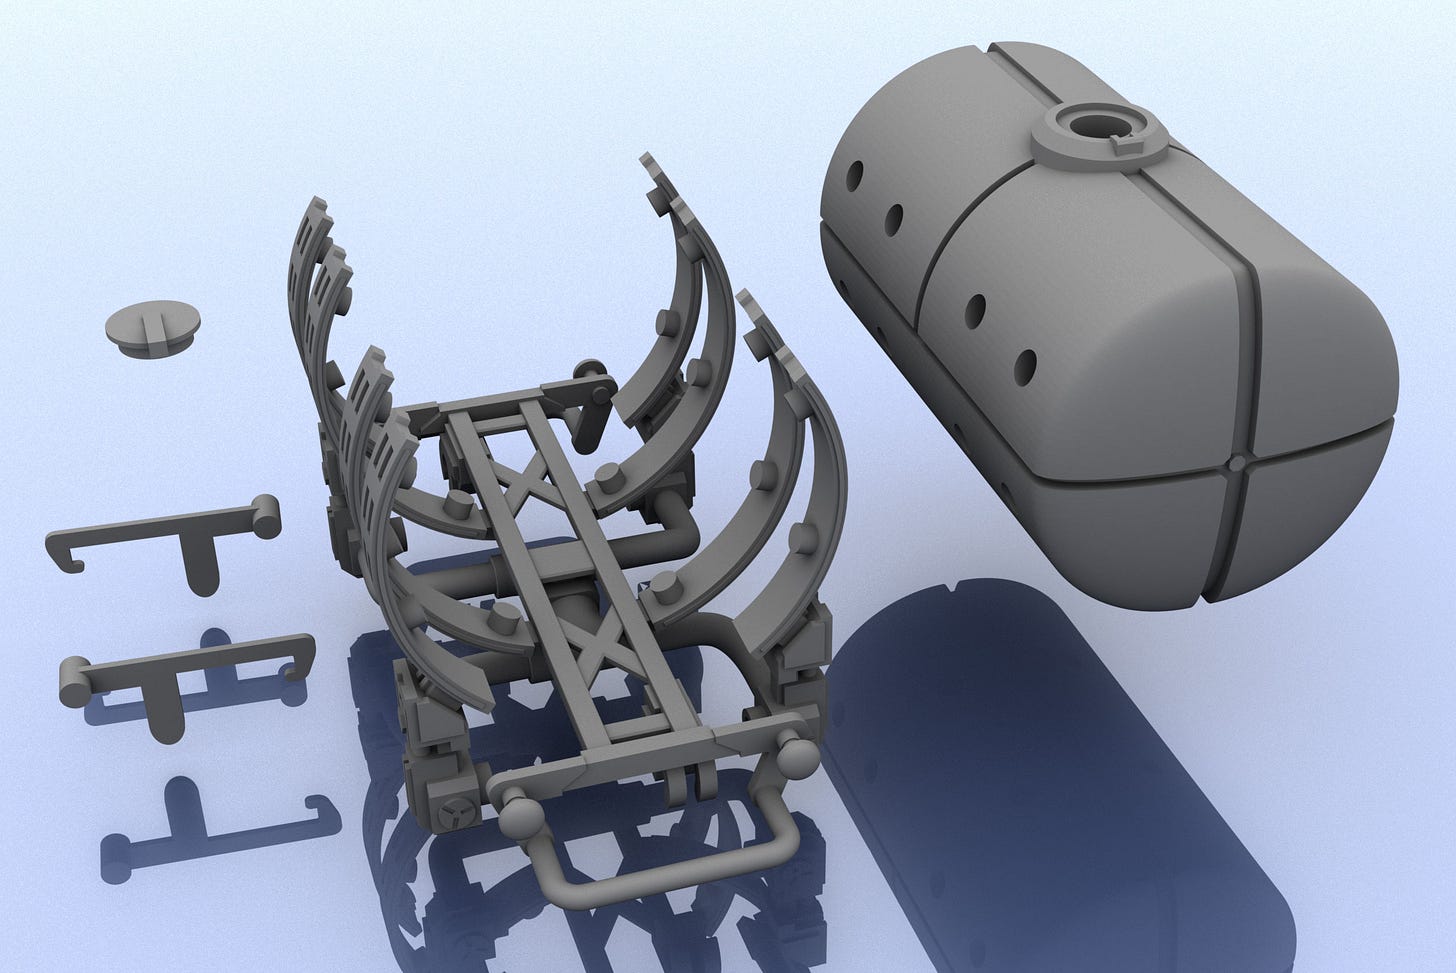
I split the model in to separate objects. The lengthiest part of this fix was finding a way for the tank to be held in place securely. It took seconds as the solution already existed!
On the original mesh, vertical arms were fitted with circular rods extending inwards to support the tank. All I did was extend these rods to penetrate further in to the mesh, then drill holes in the tank so the 2 objects aligned.
I was concerned that the model would be too rigid and inflexible. That the arms would snap when sliding the tank between them. Won’t know until it’s printed.
The hooks and hatch were always designed to be printed separately. The main difference is pulling the tank out. Something which has a few benefits.
Firstly, everything is easier to paint. The underside of the the lower chassis, though more accessible, is still tricky to paint. It doesn’t matter much as it won’t be visible and the colours should be fairly similar. The tank is more likely to be a completely different colour than the chassis, which is now separate so bleeding isn’t an issue. Arms holding the tank are also easier to paint.
The next benefit is reliability with printing. There were lots of errors on the first print which did not occur for the second. This is due to reworking supports and a slight adjustment in print settings. If there is ever an issue with printing the tank or the chassis, the entire model is no longer a write-off. I could adjust the model or settings, then print the failed section again.
Lastly, the tank now has 20 more holes for uncured resin to drain through. Always good.
There were a couple of minor tweaks to some scaling on finer details, but it’s basically the same model split in to 2 pieces.
The support arms weren’t as flimsy as I anticipated. In fact they were surprisingly flexible. There was plenty of give to slide the tank through and the arm pins held the tank securely without glue. I consider that another benefit; the tank can be swapped out if the owner has multiple tanks sporting different designs.
Wheels were also very easy to fit. Possibly too easy? I will monitor this in future designs. If the axle housings are too flimsy they could snap and the chassis is worthless. Too loose and the axle will fall out. Too rigid and it would be difficult to fit axles, potentially snapping the chassis.
I’m using my 3D printed wheels for testing, which have the benefit of being flexible themselves. Way easier to fit, though I’ve had no issues with fitting my metal wheels either.
When I said the tank was held securely, that was after some modifications to the tank. The connecting pins need to be smaller than their respective holes. By how much? It seems to differ from print to print.
If holes are too large for their pins, the arms will push too far in and make contact with the tank. I don’t like how that looks but it’s not going to break anything.
The initial idea behind the pins was that they held the tank in place while creating an air gap. If holes are too thin, the pins won’t fit and the tank won’t be held in place.
I could have made flared pins so that they wouldn’t fully penetrate the mesh, but decided that’s not very user friendly. What if the owner wants the supports to be pressed fully against the tank?
The holes are only around 0.08 mm wider than the pins. It looks to be plenty of space in Maya, but once printed the pins rarely fit. A couple of minutes filing the holes to your desired width and everything snaps together perfectly.
I did make a couple of holes far too large. Well, If 0.1 mm is considered large? Even when pins were sliding in and out with no friction, they remained in their holes and the tank was secure.
If people want the tank to be more secure, or the support arms at a specific placement, they can glue the pins.
Though flexible, the supports are still made of thin plastic and should be treated as such. Which is shy I save all my failed prints!
The above images are all from my final print, but that wasn’t the only one. My first print of the split chassis didn’t come out too well. The axle supporting areas seemed to collapse.
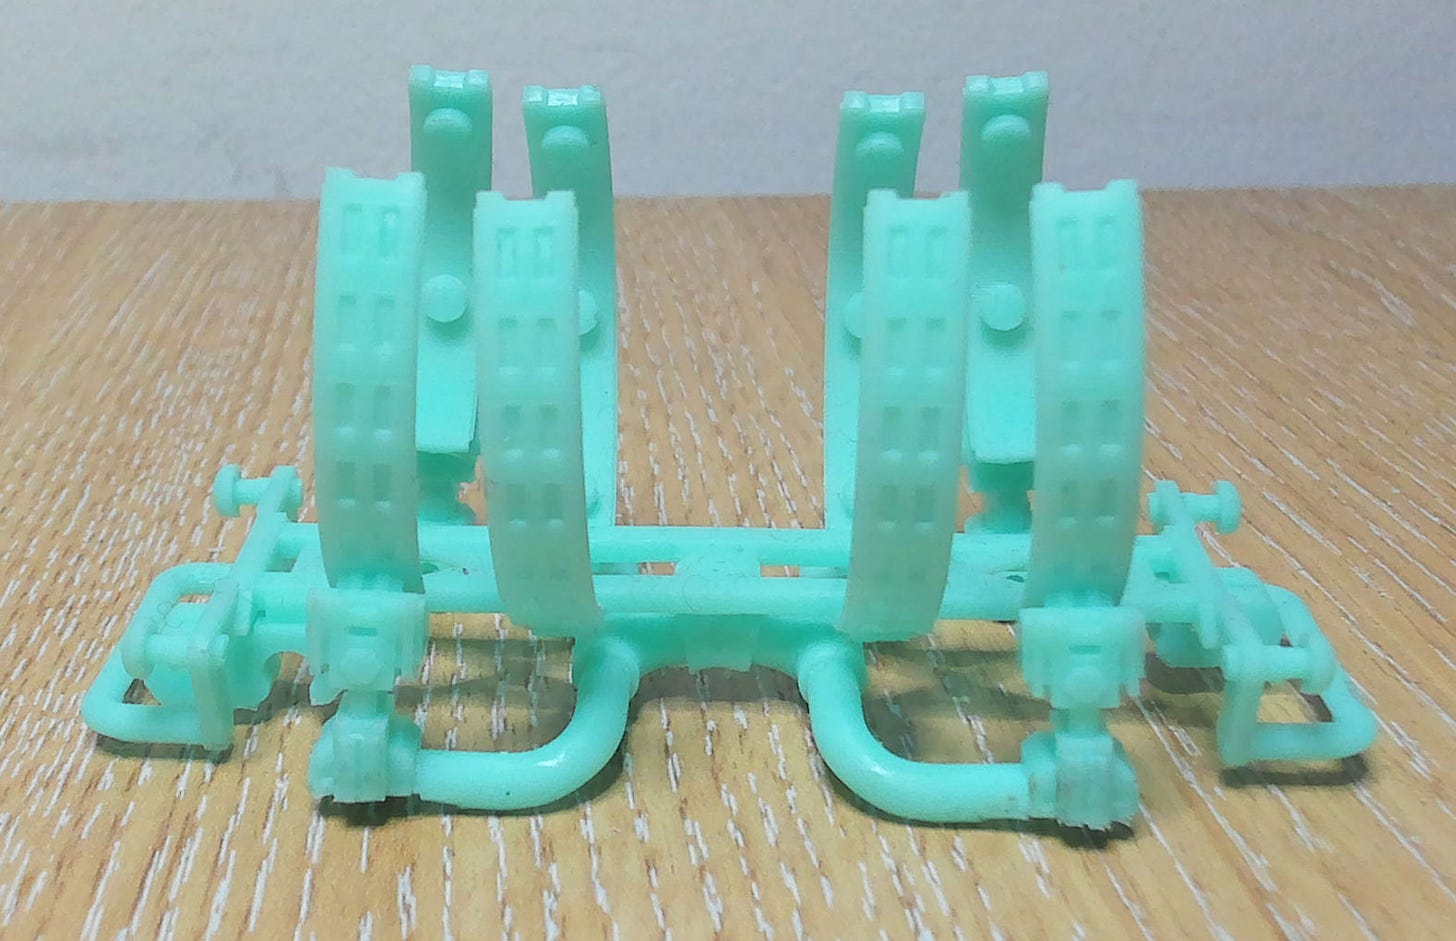
While not the end of the world, I wanted them printed so I could verify the height and see how well it rolled on track. Being my first fully printed piece of stock, I wanted to make sure it moved fluidly and didn’t roll over on corners. It is rather top heavy, reminder it’s using lightweight 3D printed wheels, even with the hollow tank.
Exposure times were tweaked and better supports added to the affected areas. Printed fine after that.
I have a box full of useless prints that stuff like this is thrown in to. Most of my models were printed months ago, I just didn’t have time to write about them until now. In that time the supports began to warp a little. This is due to a few factors:
Not being attached to a tank and pushed up against other failed prints.
Not cured for long enough (print failed, why bother).
Flimsy chassis?
The wheel braces, which failed to print, are part of the support structure. Maybe the overall structure was weakened?
Although deformed, supports are still flexible and fit on to a printed tank without issue. I don’t see any issues going forward so long as a tank is always fitted. Or fitted for long enough to prevent warping.
I consider this model a success. Everything snaps together, it rolls along a track with little friction (would be better with metal wheels or sanded with a gloss finish) and hooked on to retail stock I have.
The design is going in to the saved folded.
Next time
I’m stepping up the boredom factor with some generic hoppers! Not too generic but how exciting can a hopper be?


